Showing posts with label Chalk Pastel. Show all posts

Monday, February 3, 2020

Northern Lights Landscapes

Credit: Elements of the Art Room, Mrs. Cartmill's Art Room

Supplies:
Chalk Pastels (various warm and cool colors)
White Oil Pastels
White Cardstock Paper
8.5x11 Black Glitter Paper
Black Acrylic Paint and Paper Plates (for palettes)
Fan and Flat Brushes
Baby Wipes

If you've been at Prairie View since Kindergarten, this will be our fifth Northern Lights project! But for those of you just joining us, let's review The Science and Beauty of Auroras!


Here is our project today:


Now that we know the science, let's take one more look at the colors and how the lights dance and move as we get ready for our art project!


Instructions:

1. Hand out Glitter Paper.
2. Add a thick white line to the bottom of the paper using a white oil pastel (about a 1/4 of the way from the bottom of the Glitter Paper). We want to leave lots of "sky" above for our Northern Lights.
3. Next we are going to work on our Northern Lights. Take a look at this video for the technique before you begin. (Turn off video at 2:51 mark as we will be doing something different with our landscapes once the Northern Lights are completed).


4. Tear white cardstock horizontally.
5. Lay down the cardstock and add warm chalk pastel colors to the top along the torn side (only on the white - not the black glitter paper).


6. Once all of the colors have been added to the torn side (see example above), place the cardstock near the top of the black glitter paper and using your finger, swipe up to transfer the chalk pastel to the black glitter paper like in the video. See how the colors are blending?


7. Tear off another strip of white cardstock in a different pattern and now use cool colors. Remember that we want our Northern Lights to move across the paper!


8. Alternate warm and cool colors with the remaining cardstock - moving the cardstock around to create different directions. Notice that some are close together and others are spaced apart. Make sure to take a look at your spacing and plan so that you are able to get all four strips onto the skyline before you reach the "snow."


9. Once you have your Northern Lights completed, fill in the bottom with the rest of your "snow" (if not already completed).
10. Add a couple of trees (2-3 only) to the landscape. Watch this video (and technique) that we have used before:


11. Set aside to dry. Once dry, feel free to add a little bit of white oil pastel to the tips of your trees for "snow."

Tuesday, January 26, 2016

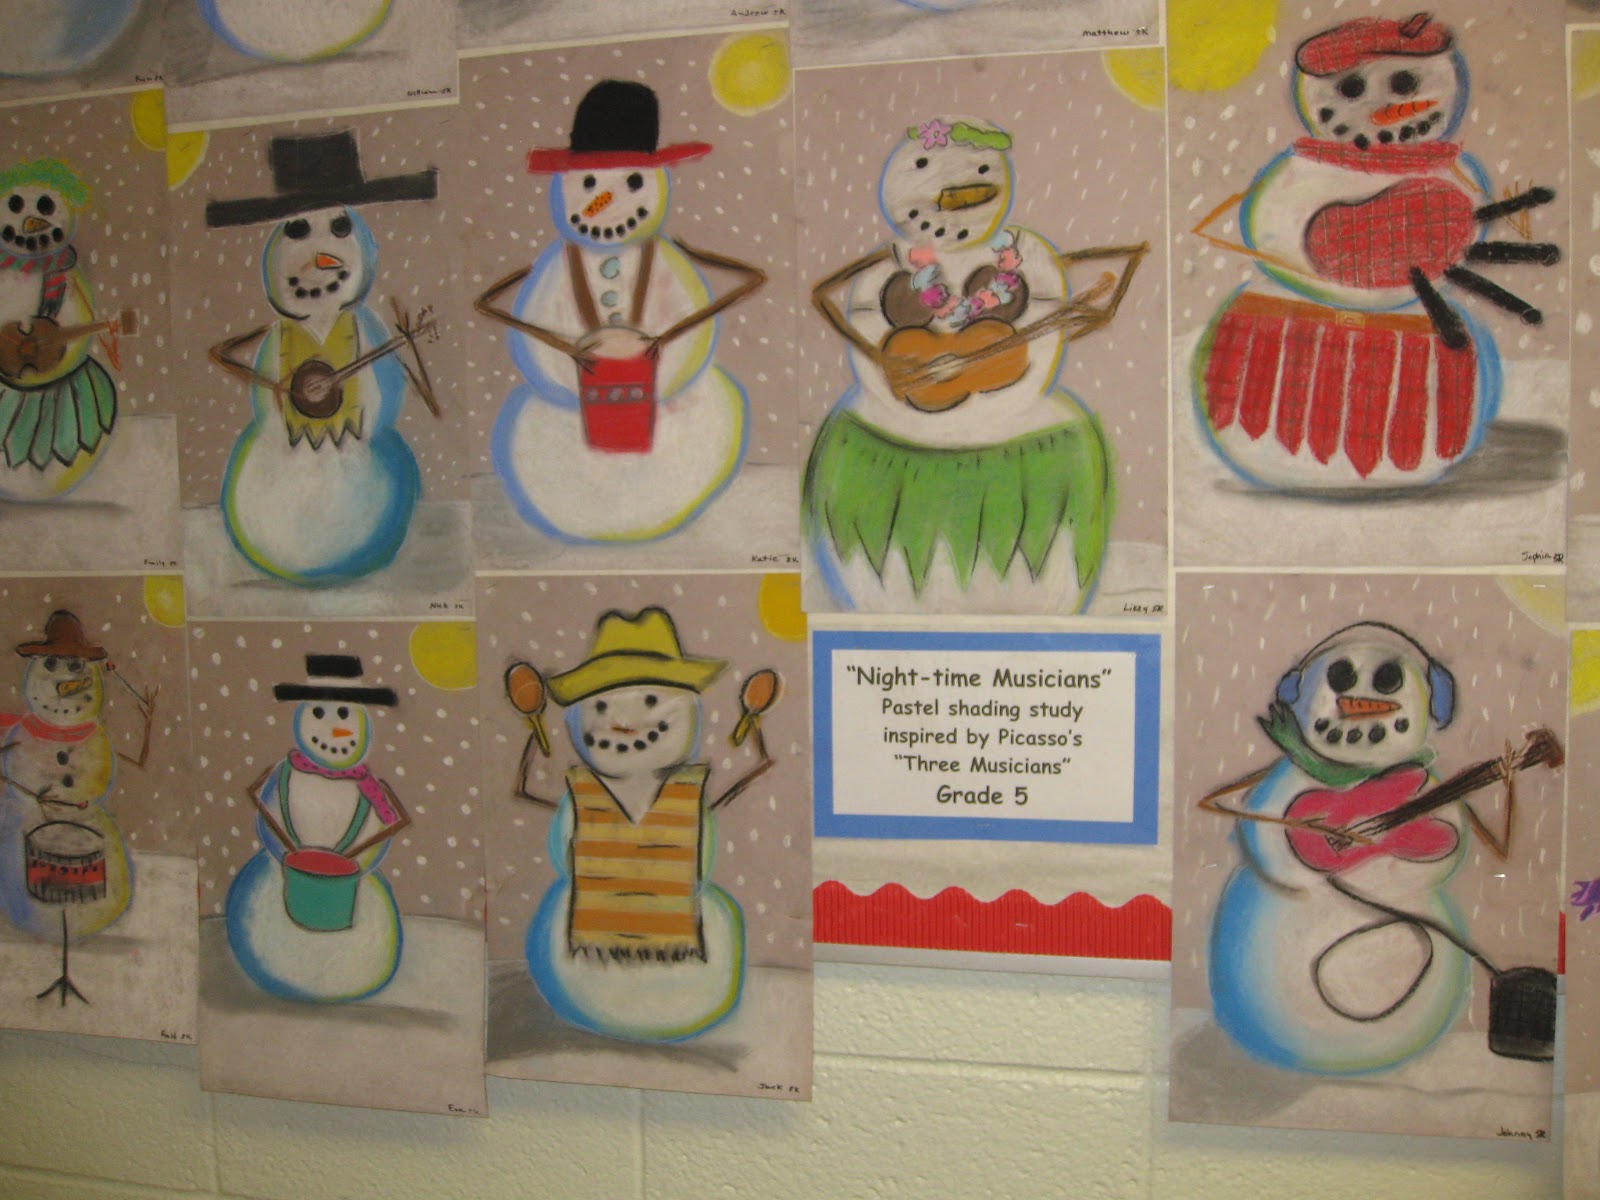
Picasso Inspired Musicians of the Night


https://s-media-cache-ak0.pinimg.com/originals/81/f6/f5/81f6f55790da1a5c6e27fcc248c50320.jpg
Artwork was taken from Pinterest without an artist’s credit.

Medium:  Chalk Pastels


Reason for Lesson:  Lesson was designed to teach the element of space using the artwork of Picasso.


Prep Time:  30 minutes


Preparation prior to the lesson:  Study the life and works of Picasso including “Three Musicians”
This youtube video was helpful for shading and the technique of the chalk pastels for snowmen.


Materials:
Grey paper, colored paper as a mat.
Grey paper is cut to 6 x 9 inches.  The mat is 9 x 12 inches.
Chalk pastels for students
paper towel for each student
baby wipes to keep hand clean for each student


Instructions to Lead Lesson:
Begin talking about the life of Pablo Picasso.  Share interesting facts about his life and include his art “Three Musicians”


The Element of Art we are discovering is space.


We are going to create a snowman musician in the night using chalk pastels.
Some important techniques to remind the children of chalk pastels are:


Chalk pastels are fun to work to blend and soften colors.  Use a tissue or paper towel to blend; avoid using fingers to blend.
Keep your hands clean and be careful while touching your art so as not to muddy up the art.  Instead of blowing the chalk off the paper tap to remove any excess.
Wipe off your pastels after to each use to keep their pure color.


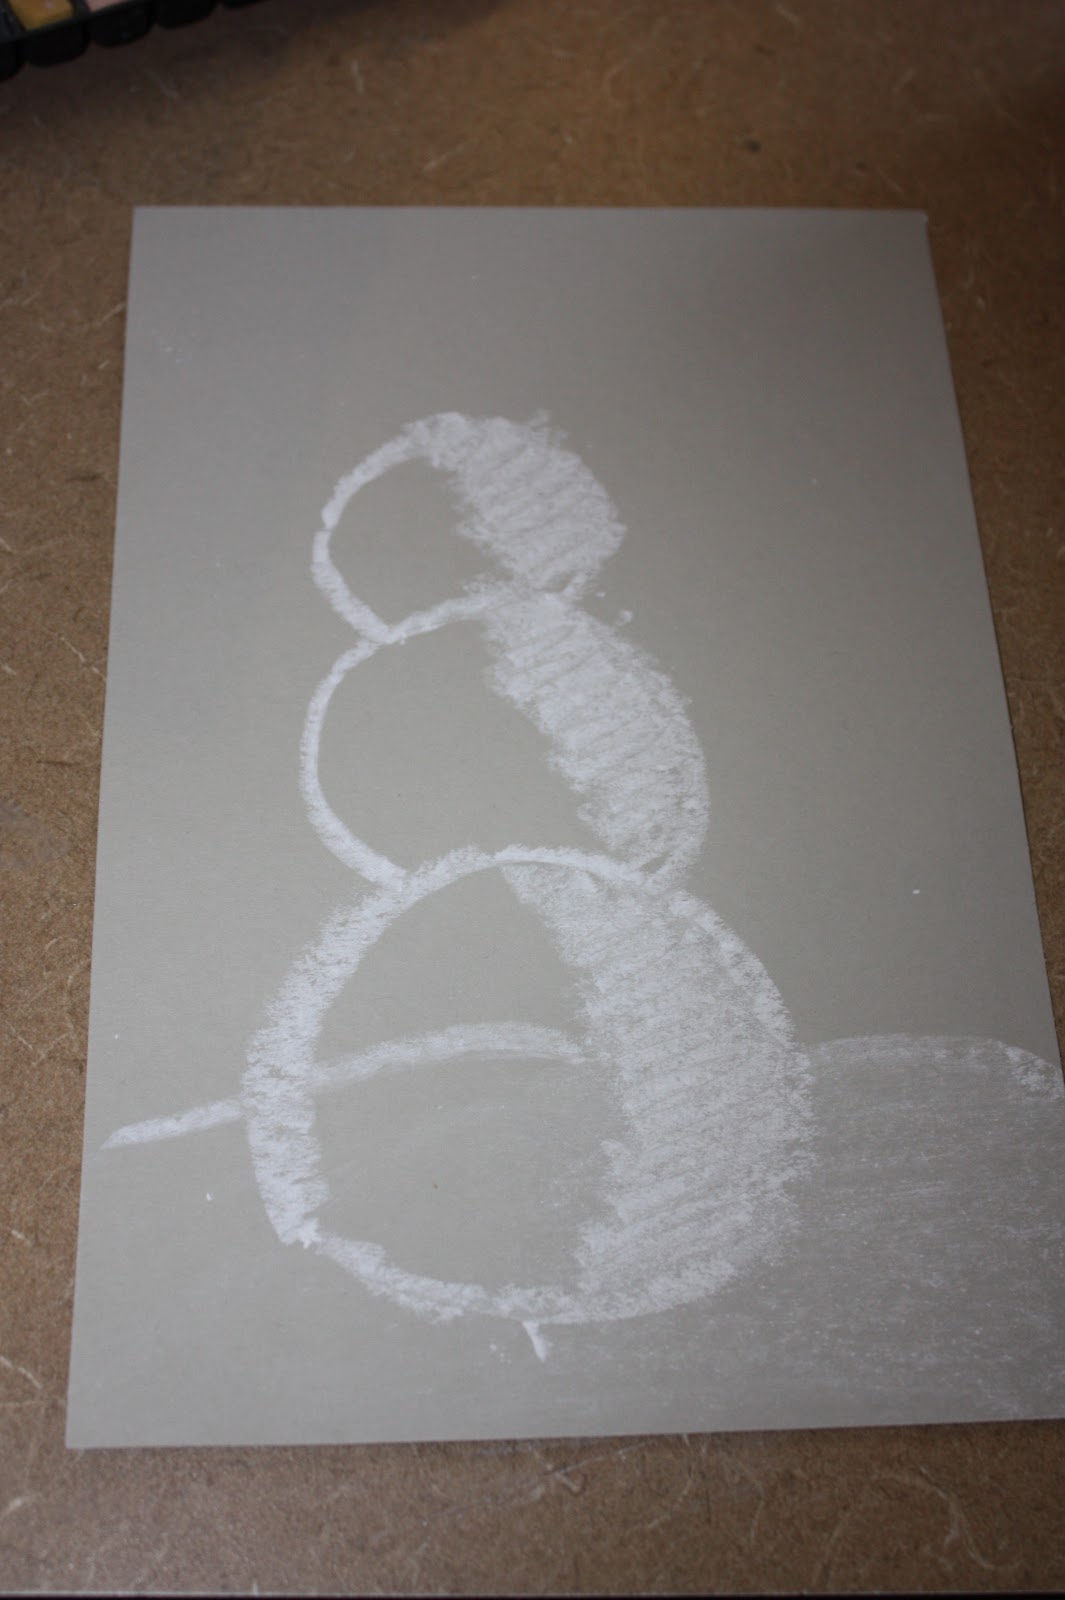
Using the grey 6 x 9 inch paper draw with white pastel the ground and the shape of the snowman.  Shade with white the side of the snowman that faces toward the moonlight.  Softly blend white chalk to the other side to fill in the snowman.


Sweep yellow chalk on side of snowman facing the moonlight.  Sweep light blue on the backside of snowman to create a shadow.  Add light blue and a small sweep of black (creating grey) on the snow hill to cast a shadow of the snowman.  Blend the colors using a different section of your tissue after changing to each color.  Use a clean portion of the cloth to wipe each chalk pastel after use to keep from muddying the colors.


It is now time to add details.  The snowman’s face, hat, scarf, clothing, arms and musical instrument.  Blending as needed with a tissue. Lastly, add white dots of snow.  Mat on colored paper.  Spray art outside with a clear sealer.

https://s-media-cache-ak0.pinimg.com/originals/81/f6/f5/81f6f55790da1a5c6e27fcc248c50320.jpg