Showing posts with label Movement. Show all posts

Monday, February 3, 2020

Northern Lights Landscapes

Credit: Elements of the Art Room, Mrs. Cartmill's Art Room

Supplies:
Chalk Pastels (various warm and cool colors)
White Oil Pastels
White Cardstock Paper
8.5x11 Black Glitter Paper
Black Acrylic Paint and Paper Plates (for palettes)
Fan and Flat Brushes
Baby Wipes

If you've been at Prairie View since Kindergarten, this will be our fifth Northern Lights project! But for those of you just joining us, let's review The Science and Beauty of Auroras!


Here is our project today:


Now that we know the science, let's take one more look at the colors and how the lights dance and move as we get ready for our art project!


Instructions:

1. Hand out Glitter Paper.
2. Add a thick white line to the bottom of the paper using a white oil pastel (about a 1/4 of the way from the bottom of the Glitter Paper). We want to leave lots of "sky" above for our Northern Lights.
3. Next we are going to work on our Northern Lights. Take a look at this video for the technique before you begin. (Turn off video at 2:51 mark as we will be doing something different with our landscapes once the Northern Lights are completed).


4. Tear white cardstock horizontally.
5. Lay down the cardstock and add warm chalk pastel colors to the top along the torn side (only on the white - not the black glitter paper).


6. Once all of the colors have been added to the torn side (see example above), place the cardstock near the top of the black glitter paper and using your finger, swipe up to transfer the chalk pastel to the black glitter paper like in the video. See how the colors are blending?


7. Tear off another strip of white cardstock in a different pattern and now use cool colors. Remember that we want our Northern Lights to move across the paper!


8. Alternate warm and cool colors with the remaining cardstock - moving the cardstock around to create different directions. Notice that some are close together and others are spaced apart. Make sure to take a look at your spacing and plan so that you are able to get all four strips onto the skyline before you reach the "snow."


9. Once you have your Northern Lights completed, fill in the bottom with the rest of your "snow" (if not already completed).
10. Add a couple of trees (2-3 only) to the landscape. Watch this video (and technique) that we have used before:


11. Set aside to dry. Once dry, feel free to add a little bit of white oil pastel to the tips of your trees for "snow."

Friday, October 20, 2017

Watercolor Resist Spider Webs: A Lesson in Color, Line and Rhythm


Now let's make these cute little lolly pop spiders to finish up our project! Each of you will be given a kit with 4 pipe cleaners, 1 lolly pop and 2 googly eyes. Please look at the pictures and follow the instructions. When you are finished, please bring your spiderwebs, lolly pop spiders and googly eyes and come up the front of the room and one of our docents or your teacher will help you add your spider to your web. 


Tuesday, March 1, 2016

I AM


Grade:  4th

Medium:  Tempera Paint

Reason for Lesson:  
Elements of Art: Color, Line, Shape, and Space
Principles of Art: Movement, Rhythm

Label:  Color, Line, Shape, Space, Movement, Rhythm
Prep Time:  10 minutes
Preparation prior to lesson:  Collect supplies from Art Closet (4th grade bin)
Class Time: 45 minutes – 1 hour

Materials: Watercolor paper, tempera paint, paint brushes, paper plates (for paint), paper towels, water cups, black sharpie markers, pencils, “I Am” worksheet.          

Instructions to Lead Lesson:  
·              Have students first divide their paper in to 10 different sections using wavy lines across the entire page using a pencil. Have them use 2-3 finger spacing between each line.

·              Talk with the students about how different colors give different feelings and that each color may represent a different feeling for each person. Blue may feel sad to one student or calm to another. There is no right or wrong.

Brainstorm with the kids to come up with different emotions that correspond to different colors.

Have the kids choose four colors that represent them.*

Have the kids use those four colors to paint their I AM portraits. Make sure they use as little paint as possible to speed drying time.

·              While sections are drying, have the students brainstorm ideas about themselves.  Coming up with at least 15 ideas.

·              Ex:  I am Smart, I am kind, I am creative, I am nice, I am inventive, etc.
·              When paint has dried, Outline each section in permanent marker.

·              Using a permanent marker, have students write “I Am…” at the top and in each section write their descriptive words.  Make sure the letters touch the top and bottom line of each section. (see below example)


·              The last section students will write “I Am (their name)”.

TIPS
  • A paint table might be a good way to distribute different paint colors for this project. Have a table set up in the back with all the paint colors and paper plates. As the kids choose their colors put a small amount of paint on a paper plate and hand them out one by one. 
  • One volunteer can be doing this while the Art teacher is brainstorming with the kiddos.
  • Make sure the kids know to use VERY LITTLE paint for this project. It is going to need to dry before using the black sharpie


·          


Credit:  rundesroom.com

Monday, February 1, 2016

Geometric People


Artist:  Keith Haring

Grade: 4th

Medium:  Construction Paper

Reason for Lesson: To teach principles of shape, movement and proportion

Element of Art:  Shape

Principle of Art:  Movement and Proportion 

Prep Time:  15 minutes 

Class Time:  45 minutes

Materials:  Black construction paper, Colored construction paper, Glue, Scissors

Instructions to Lead Lesson:  
  • Show Keith Haring’s picture and discuss his life and type of art briefly. Discuss with the students what influenced his work and how he became interested in art.
  • Bridging the gap between the art world and the street, Keith Haring rose to prominence in the early 1980s with his graffiti drawings made in the subways and on the sidewalks of New York City.
  • Combining the appeal of cartoons with the raw energy of Art Brut artists like Jean DuBuffet, Haring developed a distinct pop-graffiti aesthetic centered on fluid, bold outlines against a dense, rhythmic overspread of imagery like that of babies, barking dogs, flying saucers, hearts, and Mickey Mouse.
  • His early influences included: Walt Disney cartoons, Dr. Seuss, Charles Schulz, and the Looney Tunes characters in The Bugs Bunny Show

  • Show Keith Haring’s Artwork “Dance”.  Have students talk about what they notice and write their thoughts on a board.

  • Have the students stand and position their bodies in different poses with bent arms and legs like the figures in Keith Haring’s artwork.
  • Point out elbow and knee joints and how arms and legs have two main sections
  • Talk about geometric shapes.  Draw the shapes on a white board as students list the shapes. 


  • Ask the students which geometric shapes could be used for different parts of the body.  (i.e. head, arms, legs, feet, fingers)
  • Draw a human figure on the board using only geometric shapes.  Leave spaces between each of the shapes.

  • Have the students start their own figure. Have them cut out different shapes to represent parts of the body and lay the figure down on black construction paper.  Tell them to make sure the figure shows movement.  Have them place their shapes on the black paper before gluing.  This allows them to move the shapes around.  Once they’ve created their figure, have them glue one piece at a time and keeping the others in their place until all shapes are glued down. 


Saturday, October 31, 2015

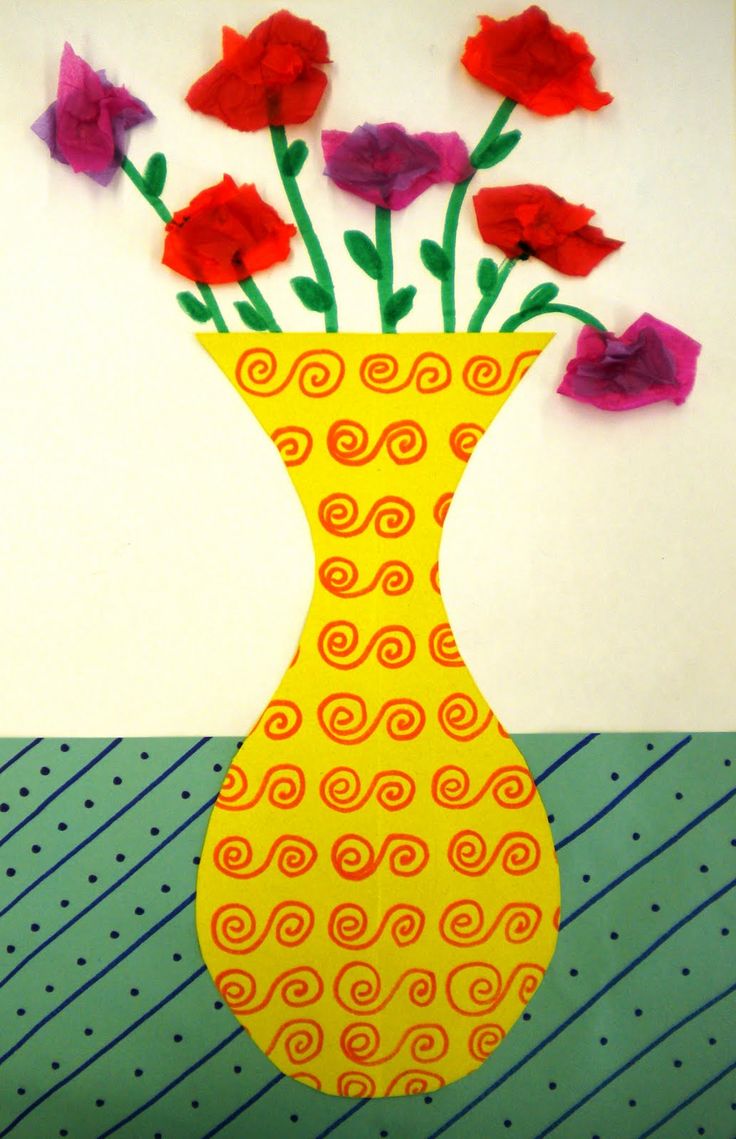
Matisse Flower Vases


Title of Lesson:  Matisse Flower Vases
Medium:  Paper collage and sharpie
Reason for Lesson:  Learn about the artwork of Henri Matisse and the principle of patterns and color.
Label:  Color, movement, harmony, Matisse, Flower, Collage, 5th grade

Prep Time:  20 miutes

Preparation prior to lesson:  gather supplies, cut tissue paper into 2x2 inch squares

Class Time:  1 hour
Materials: White Background paper. Many different colors of construction paper. Markers, Sharpies, Glue, 2x2 inch square colored tissue paper

Instructions to Lead Lesson:  

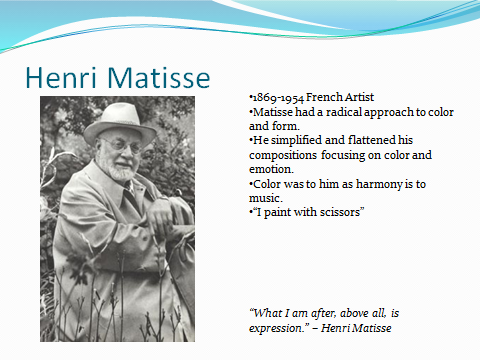
Introduce Henri Matisse. Give a brief bio and try to relate his life in some way to the kids (keep this lesson time brief, take no more than 5-10 minutes for the Artist lesson)

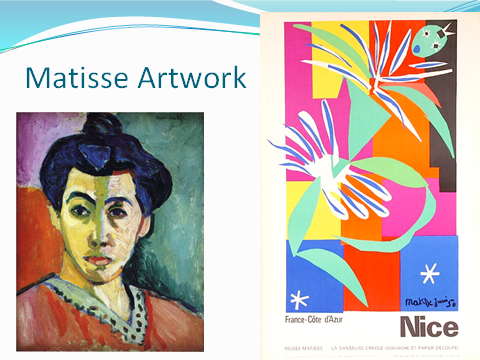
  • Show examples of Henri Matisse’s artwork and have the students discuss what makes Matisse’s artwork unique. Talk about what the artist is trying to convey with his art. What feelings are evoked?
  • Have the students discover different repeating patterns in Matisse’s artwork. Have them look for all the different variations of pattern. What colors, themes, medium does he use? What feeling  does the repeating pattern create in the artwork? Be sure to point out that Matisse “Painted with Scissors”. He used collage and patterned paper in much of his later artwork.
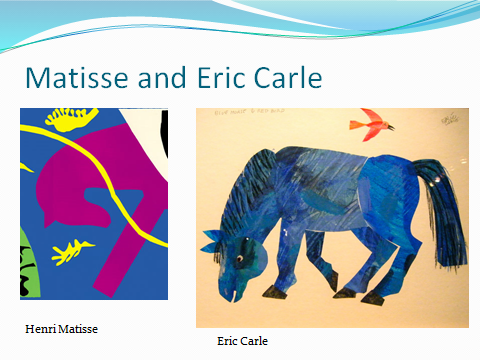
  • Point out that Eric Carle (The Very Hungry Caterpillar) was influenced by Matisse. You may wish to show some of Eric Carle’s books to show how he was influenced.

In 5th grade for the month of January the students are learning about the Renaissance. Use this art lesson to highlight how art is influenced and evolves over time.
  • Art prior to the Renaissance (the 1200’s) was flat and lacked perspective or realism. The subjects were not drawn in believable or realistic settings. Show Cimabue, Madona Enthroned
  • Most artwork was of a religious theme prior to the Renaissance
  • The Renaissance was a time of artistic change. Leonardo Davinci influenced how artists created during the Renaissance. He started adding more realism and made the subjects more lifelike. He also added more believable settings and included nature in his artwork. Show Leonardo, Madonna on the Rocks, 1483)
  • What differences do you see in these two pieces? What similarities?

  • Fast forward to Henri Matisse (1900’s). Show pictures of Henri Matisse. How is his artwork the same or different from the Renaissance artwork. What elements are the same and what has changed?
  • Art is still changing. Eric Carle (1929) was influenced by Matisse.  How do you take what you like from your friends and make it your own?


  • Create the patterned vase on a collage background artwork
matisse vase.jpg

  • Begin with Vertical 12x18 in white watercolor paper and 5 sheets of various sizes of colored construction paper and 1 8x10 piece of colored construction paper
  • Cut large blocks out of the colorful construction paper students may wish to cut some wavy lines for edges (keep it simple for time)
  • Choose two color blocks and draw a repeating pattern with sharpie (time permitting. To finish in an hour this step may need to be omitted)
  • Clue colored blocks to cover the entire white paper background.
  • Take a 8x10 solid piece of colored construction paper and with the sharpie draw a repeating pattern to fill the entire page.
  • Fold patterned paper in half (vertical) with pattern on the inside.
  • Draw and S shape on the fold. Be sure to draw the lines from top to bottom staring from the top right corner and finishing at the bottom of the page.
  • Cut along the lines and open up to form a vase.
  • Glue the vase onto the background aligning bottom edges
  • Place Elmers glue drops on the background several inches above the vase at various heights
  • Glue down 5-7 pieces of tissue paper. Wait until dry and then crinkle.
  • Add stems with construction paper if desired.

Credit:  artwork influenced by http://artiswhatiteach.blogspot.com/2010/04/2nd-grade-matisse-flower-vases.html?m=1


Tuesday, November 13, 2012

Op Art Blobs


Op Art Blobs

Reason for Lesson:  Teaching the Principles of Art, rhythm and movement and using the Elements of Art, lines and color to create Op Art.  The regular repetition (rhythm) of the lines produces the look and feel of movement.  Additionally, when shading is used (darker on the outside edges and light in the middle) we see the lines become 3 dimensional and appear to move across the paper.  

Class Time:  1  hour to 1 and ½ hour (by decreasing the size of the paper you can decrease the art time if necessary).

Materials:  White construction paper, pencils, and colored pencils.

Prep Time:  15 minutes

Prep Prior to Lesson:  Can use the power point from Mrs Brown Art - Op Art Shading Blobs.  Familiarize yourself with Op (Optical) Art.  Optical illusion- when something plays tricks on your eyes.  Op art is artwork that plays tricks on the viewer's eyes.  Get to know two well known artists:  M.C. Escher and Bridget Riley (prints have been made of some of their artwork for example).

Instructions to Lead Lesson:
Introduce “Op” Art and its ties to optical illusion.  Introduce the artists Escher and Riley, displaying and talking about the dynamics of their artwork.  

Start by drawing a curved line across the middle of the width of the paper.  Emphasizing the line as “a rolling hill and not a roller coaster” stretching from one side to the other.

Place eight dots randomly on the line, with the outside dots being near the edge of the paper.  (If you are using a smaller piece of paper you should use six dots instead of the eight).

Now it is time to connect the dots with bumps.  The dots close to the edge of the paper will go off the edge to an imaginary dot.  Continue connecting the dots using bumps until the paper is filled, eventually the lines will go off the top and bottom of the paper.
 Choose a group of colored pencils that you'd like to use.  Randomly color each section of your blob, pushing harder at the corners of each section and then lighter and lighter as you get to the middle.  This is the most time consuming part of the lesson.  It is possible to leave some of the sections white or even a whole column “undone” and still be able to see the effects of the lines and shading.