Thursday, April 18, 2013

MoMMA Event ...a Quick Peek with more to come!

Our 1st Annual Art Show, MoMMA, started last night and ends tonight.  Last night was amazing!  With much excitement and pride, our kiddos showed what magnificent artists they are!  

Tonight is the night for a intermediate grades of 4, 5, and 6.  Starts at 7 and ends at 8.  If you wish, please consider a donation of $1 or more which supports our growing program for more art supplies!!!

So here is a peek:

PTO President, Kelly, placing SOLD on a students purchased artwork

6th Grade POPART Collection

5th Grade

A quick review on the Elements of Art

Our 3rd Graders tribute and artwork like artist Fred Babb

1st Grader's Silhouette Art...Beautiful!

What does a Kindergartner "what to be when grown up" Art

Paint Brush Treats!  Yummy!!


Picasso inspired Artists are in this School!

Amazing greeter and Co-Author of this blog...Deanna!

Proud Parent with her Kindergartner

See how fun this is!!!!  Thank you PV PTO!!!

There are more pictures and a event review coming...check back next week after we are all cleaned up!!

Happy Creations!

Monday, March 25, 2013

Springtime in the Palouse, Rhythm and Pattern


Springtime in the Palouse, Rhythm and Pattern


Medium:  Watercolors

Reason for Lesson:  To learn about the rhythm forms and patterns in art

Prep Time:  30 minutes

Class Time:  45 to 60 minutes

Materials:  Watercolor Paper, Watercolor Paints, Sharpies Ultra Pens, Crayons, Paint Brush, Ruler.  Optional for flowers: pencil, glue and tissue paper 

Steps for Lesson:
1.  Have student write number on back for paper

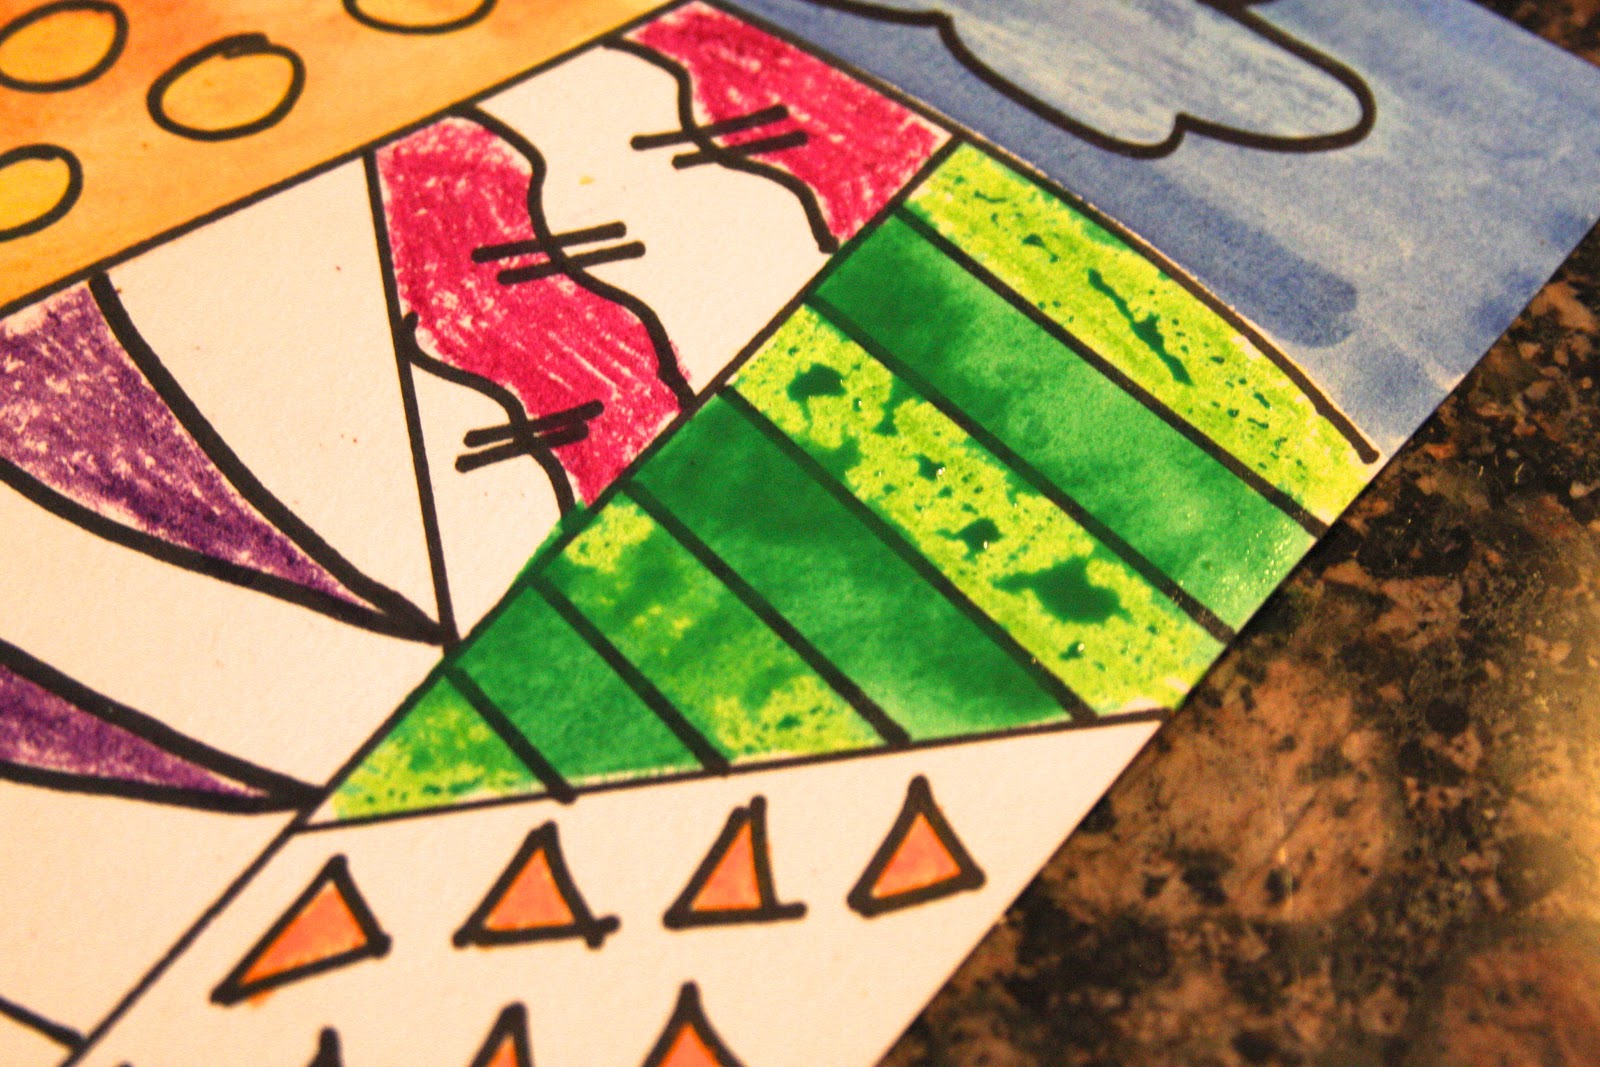
2.  Draw rolling hills (suggest 2, 3 max)

3.  Using ruler, divide hills into 3-5 segments

4.  Using ruler, divide segments into 2-3 block segments

5.  Inside block segments, draw patterns, shapes, lines, etc.

6.  Using crayons, color in the shapes, between lines, how ever you choose :)

7.  Begin to paint with watercolor paints inside the block segments.


 It's great to mix your paint using warm colors with warm color, cool with cool

You can even create interesting clouds and sun, making them a little different in color than we are used to. 


8.  HELPFUL HINT!!  The watercolor paint will float in the crayon markings...if you get too much paint, use a paper towel and dab dry.  Also, to lighten paint, use more water and smooth out, you may also use a paper towel and dab.  


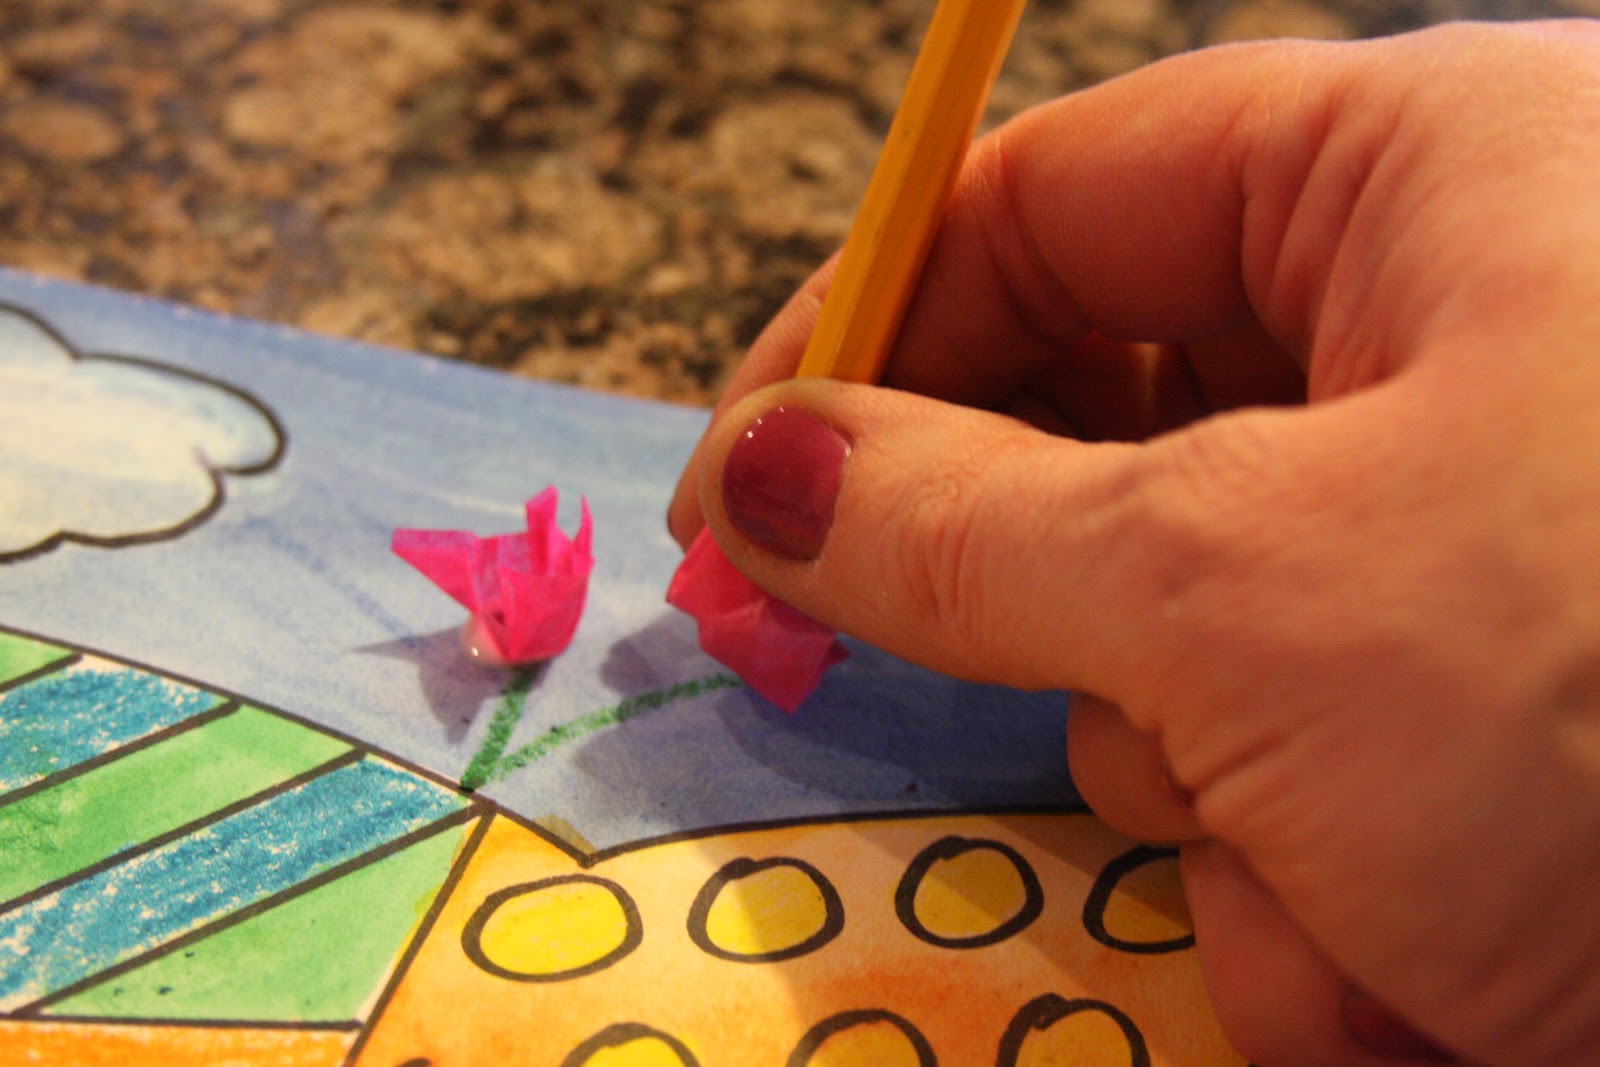
OPTIONAL: If you have time, a student chooses, have student draw flower stem.  Using 1x1inch tissue paper, pencil and glue, glue on little paper tulips on art piece   

Wrap tissue onto pencil as shown below.  Use just a small dab of glue.

DONE!

Saturday, February 16, 2013

Colorful Creative World of Fred Babb


Art is FANTASTIC


Art is YUMMY

Art is MAGIC

Art is ME!

Colorful Creative World of Fred Babb
Fred Babb was one of the most colorful, expressive and funky, fun artists of our modern times. He is an absolutely perfect study for our funky fun 3rd graders who love to use color and express themselves.  Babb's story is fun to share because he started creating his masterpieces at a young age, in elementary school...about the same age as our third graders.  This also makes Babb the perfect focus artist for our upcoming Art Gallery show.  Each of our 3rd graders will be able to freely express themselves, showing their parents the artist within.

But before we let their creatively soaked minds, doodle wildly on a canvas, let's start by teaching them about the artist.  A powerpoint presentation is available for our classroom and it was created by gathering the information mostly on the Fred Babb site.  Share his life with students and then review these 10 questions.  Students can show and share with their parents at the Art Show, all the amazing things they know about Fred Babb!

Question 1:  What state was Fred Babb born in?

Question 2:  What year was Fred born?

Question 3:  When did Fred Babb begin expressing himself in art?

Question 4:  How did Fred Babb get his art supplies...where did he get his money?

Question 5:  How many children were in Fred's family

Question 6:  Fred couldn't afford paper, so what did he use as his canvas?

Question 7:  What was the name of the Magazine in which Fred found inspiration?

Question 8:  Fred did not preplan or pre-sketch his work...how did he do it? 

Question 9:  As an adult, to earn money for his family, what job did Fred Babb do?

Question 10:  What year is Fred Babb pass away?


After reviewing the questions, spend a few minutes brainstorming what art is to them.  Art can be magical, fun, colorful, imaginary, and so on...  You may need to help some students spell out the larger words.  We are just about ready to let the oil crayons roll about, but first, I want to share a sentiment from the blogger at Deep Space Sparkle.  She wrote a sweet reminder to all of us art teachers; so simple, so perfect.  

"Fred died in 2006. I would have like to have met him. He stood for everything I believe art should be; an extension of oneself that is not necessarily taught, but understood. I try to remember this each time I walk into my classroom and face the little individuals that we often clump together as a whole. I try to remember that each child has a story. Each child has an expression.  I don’t always maintain this level of thinking. Often I succumb to the pressures of classroom management and parent expectations. At times, I’m a slave to the minutes on the clock, finishing the project, encouraging the kids along.
Rushing.
Poking.
But when I browse through my collection of Fred’s Art, he slows me down. Reminds me of why I’m here. Nudges me to think in broad terms. Tells me to remember the most important thing of all: don’t let yourself be the reason kids abandon art. 
Be the reason why they embrace it…for life."  
Thank you Ms Palmer for giving us all some re-focus.  :)


Medium:  Oil Pastels

Reason for Lesson:  To learn about the artwork and the artist Fred Babb, and to explore the limitless self expression in a self portrait using color, shape and tons of imagination. 

Prep Time:  20 minutes

Class Time:  20 minutes for lesson time about the Artist, then 45 minutes for art creation.

Materials:  Oil Pastels, Paper Sacks* (will require extra prep time) or Black Paper.
* We wanted to have our kids really experience what Fred may have when he created.  Using grocery paper sacks will require extra prep time for trimming.  Obviously use the side of the bag without the seam.  However, keep the seem side to use as a barrier sheet if you plan on storing the art to prevent smearing on other students artwork.  To help grocery sacks lay flat, mount on background paper.

Tips for Lesson:
Oil pastels can be a little difficult  for 3rd graders to use.  They are so excited to dig into their work, they will need to be reminded how to use them, and how easy their artwork can accidentally change with smears.  Here is how I suggest they use them.  First, if they outline their face using a dark oil crayon, especially black, have them use it last.

Remind students to start their art from the top down.  This will help keep their art from smearing and their sleeves clean.  Using "imaginary" lines, divide the canvas into three parts.  Since we used grocery paper sacks, our imaginary line were organically included.


As suggested above, have the students brainstorm what "art is" to them.  We suggest to use the top portion #1 for coloring ART IS.


Next comes the self portrait portion...

Bottom section is for what art means to the student...fun, funky, it'll be fabulous! 


Answer 1:  Minnesota
Answer 2:  1947
Answer 3:  Early elementary school age, around 3rd grade
Answer 4:  Fred used his lunch money
Answer 5:  Fred was a middle child in a family of eight (8) children
Answer 6:  Fred used Grocery Paper Sacks
Answer 7:  Mad Magazine
Answer 8:  Fred experiences art through the process of creating. He does not begin with ideas, he allows them to present themselves as he works.
Answer 9:  Painter and Furniture Refinisher
Answer 10: Fred died in 2006 at age 59

Thursday, January 31, 2013

Once there was a Snowman: Tall, Tall, Tall


Title of Lesson:  Once there was a Snowman:  Tall, Tall, Tall
Medium:  Elmer’s Glue, Shaving Cream, Construction Paper
Reason for Lesson:  To introduce students to the concept of TEXTURE and help them understand that a variety of textures surround them everyday.  Texture is depicted both literally and figuratively in pieces of art. Sculpture and fabric art will often have a texture that can be felt, while paintings often have a visual feel that may or may not be present when touched. 
Prep Time:  45 min.
Preparation prior to lesson:  15 minutes
Class Time: 45 min - 1 hr
Materials for Snowman/Texture Lesson: 2-4 regular bottles of Elmer’s Glue, 2-4 cans of Shaving Cream, 4 large mixing Bowls, 4 mixing spoons, Plastic spoon for each child, blue construction paper for background, black, orange and brown construction paper for adding detail to the snowman.
Instructions to Lead Snowman/Texture Lesson:  Begin the lesson by discussing with the kids what texture is.  I had the kids walk quietly around the room and feel different “textures”.  I emphasized “quietly” with the kids.  After about a minute I had them all return to their seats and the kids took turns sharing one texture that they felt. 
The kids then drew the 3 circles for their snowmen on the blue paper and then set it aside.  I then had the kids get their scissors out and we cut each piece of the snowman out one at a time. (orange triangle nose, 5 black circles for the eyes and buttons, long skinny brown rectangles for the arms, and a black hat.) I drew the shape of the hat on the whiteboard to help the students.
Next is time to mix the “snow”.  Approximately a half can of shaving cream and about half a regular sized bottle of elmer’s glue works well.  I divided the class in to 4 groups and they each were able to participate in making their own batch of “snow”.  Once mixed I took the bowls away and then went around the room and placed a scoop of snow on each of the circles the kids drew for their snowmen.  The kids used a plastic spoon to spread the mixture and fill in their circles.  
The last step is to place all the cut out pieces of the snowman on to the snow.  The pieces will stick to the wet mixture and dry glued.  No need for any extra glue.

Thursday, January 17, 2013

Texture Under the Sea


Texture Under the Sea
Medium:  Tempera Paint

Reason for Lesson:  This lesson is to teach different textures in art.  Currently, our 3rd graders are learning about the senses of water; oceans, rivers, lakes, etc.
We chose this assignment so we can touch some cool things in the water; such as fish and the reflection of their skin in the water.  We will briefly discuss currents in the water and what they may look like painted, and then the texture of beautiful colorful coral.  

Prep Time:  20mins

Class Time: (45-minutes instruction/project time) The docent will discuss different textures in art such as layered paints, mixed media using different papers, maybe even a 3-dimentional object.  Also discuss the information in Reason of Lesson.

Materials:  Foil, fish template, scissors, tempera paint, flour, paint brush, water cup , paper plates or trays, blue construction paper (9x12), large ultra fine sharpie color markers, pencil, double stick tape or glue stick   

Instructions to Lead Lesson:
Step 1:  Start with the current of the water.  Explain how currents may be different, some may even be whirlpools.  I liked to include little bubbles in the example too.  Use blues mixed with white paint. 

 
This is an example of the whirlpool, where a little fish may get caught up in the coral reef.


Step 2:  While the background is drying, have the students trace the fish onto the foil piece, using a pencil.  REMIND THEM TO BE GENTLE AS THE FOIL DOES TEAR EASILY WITH ANY FORCE.  Cut carefully.


Now the student should put on ANY design on the fish using the Sharpies...a little design or a lot..their choice.

Step 3:  Now for the real fun, the coral (this is where a teacher helper is helpful!)  Using paint colors of RED, ORANGE, YELLOW and GREEN, place a small amount of paint onto your tray, and then mix in about a tablespoon of flour.  You want the paint to have a fluffy-like, chunky-like texture.


Next, Dab on your paint.  Do NOT use stroke, just dabs

The finished project should have lots of texture!

This example is great to show what strokes will do to the painting, the lower right red coral was stroked on and the result was flat.  Plus when it dried, it curled the paper.  Dabbing will produce less wet and a much better finished project.

Step 4:  Last step is to place on the fish.  Best result is to use a couple stripes of double stick tape.  

Done!


Saturday, December 1, 2012

Nutcracker


Title of Lesson:  Nutcracker

Grade: 6th Grade ONLY!

Reason for Lesson:  In the spirit of the season, the students each created a Nutcracker. This lesson is about lines, measurement and proportion.  

Class Time: 1 1/2 to 2 hours

Prep for Lesson: Do some research on the history of the Nutcracker. Pre-cut 12 x 18 paper in half, lengthwise. 

Materials:  6 x 18 paper, ruler, pencil, eraser, black sharpie, oil pastels and scissors. Nutcrackers to display in class.

Instructions to Lead Lesson: 

Discuss the history of the Nutcracker.  See link provided for history of the Nutcracker http://www.magicofnutcrackers.com/Nutcrackers/HistoryofNutcrackers.htm

Discuss the shape of the nutcracker.  It's distinct lines, vertical and horizontal. 

Start by folding the 6x18 paper in half.


Fold the first 1/2 to the middle. Do this on each side.


Fold each end to the first fold. Do this on both sides.

Fold paper in half,  lengthwise. 
This creates our 'invisible' lines/proportions to create our Nutcracker.  


Have the students create the 'structure' of the Nutcracker using their pencil and ruler (see below). 

The 1st top portion will be the HAT
(Discuss and look at different types of hats for Nutcrackers)

Second portion/space down will be the FACE
(Look at different features of the face: eyes, nose (block), eyebrows, mustache (draw parenthesis to get started), mouth (block style, square, rectangle, etc) )

First larger section will be the BODY
(determine width of body and width of arms)

Below the body (second larger section and smaller section) will be the LEGS

The bottom will be the STAND with the DATE


After the Students have created the 'structure' of their Nutcracker have them add the details.  Buttons/tassels on the coat, decor to the hat, beard, hair, buckle, year on the stand, decor to the boots, etc. 

Have a display of Nutcrackers in the class room for the students to look at for ideas. 

Instruct the students to use a ruler, pencil and eraser to create the Nutcracker. 

When they are happy with their design they will use a sharpie to trace over the pencil lines. 

Using OIL PASTELS, color in the Nutcracker. 


Using Scissors cut out the Nutcracker.

Have the students mount the Nutcracker and sign their autograph!