Wednesday, January 14, 2015

Jazz (Icarus) by Matisse - "Painting With Scissors"


Medium: Colored construction paper. 

Reason for lesson: Help students learn about Henri Matisse and his style of art. Focus on his use of color, natural subjects, and especially his "painting with scissors."

Label: 2nd grade, Matisse

Preparation prior to class: Collect supplies. Cut 8.5x11 yellow construction paper in half, cut 8.5x11 red construction paper into small swuares, about 1"X11".

Class time: 1 hour

Materials: Colored construction paper (red, black, blue, yellow). Glue sticks (can use Elmer's glue but be careful of extra glue showing..leaves shiny spots). Scissors. Printed pics of Matisse artwork; include Jazz (Icarus).


Lesson Instructions:

1. Give each child one piece each of 8.5x11 blue and black paper, one of the half pieces of yellow, and one square of red, and a glue stick.

2. Give short bio of Henri Matisse.

3. Show 3-4 examples and discuss artwork of Matisse.

4. Display a copy of Jazz (Icarus) artwork for students to use as a guide. 

5. Demonstrate cutting in one connected line around the shape of a body. 

6. Demonstrate cutting a star freehand and allow students about 6 stars. Tip: show students how to cut a circle and then cut star points around it. 

7. Demonstrate cutting either a circle or heart from red paper. 

8. Have students glue all pieces on. 


Thursday, January 8, 2015

Matisse Flower Vases


Medium:  Paper collage and sharpie

Reason for Lesson:  Learn about the artwork of Henri Matisse and the principle of patterns and color.

Label:  Color, movement, harmony, 5th grade, Matisse

Prep Time:  20 minutes

Preparation prior to lesson:  gather supplies, cut tissue paper into 2x2 inch squares

Class Time:  1 hour

Materials:  12x18  White Background paper.   Various colors of construction paper. 1 8 1/2 X 11 piece of colored construction paper. ]Sharpies, Glue, 2x2 inch square colored tissue paper (5-6 per student)


Instructions to Lead Lesson:  
1.       Introduce Henri Matisse. Give a brief bio and try to relate his life in some way to the kids (keep this lesson time brief, take no more than 5-10 minutes for the Artist Introduction)

2.       Show examples of Henri Matisse’s artwork and have the students discuss what makes Matisse’s artwork unique. Talk about what the artist is trying to convey with his art. What feelings are evoked?

3.       Have the students discover different repeating patterns in Matisse’s artwork. Have them look for all the different variations of pattern. What colors, themes, medium does he use? What feeling  does the repeating pattern create in the artwork? 

          Be sure to point out that Matisse “Painted with Scissors”. He used collage and patterned paper in much of his later artwork.

4.       Point out that Eric Carle (The Very Hungry Caterpillar) was influenced by Matisse. You may wish to show some of Eric Carle’s books to show how he was influenced.
5.  
6.
     Create the patterned vase on a collage background


 Begin with Vertical 12x18 in white watercolor paper and 5 sheets of various sizes of colored construction paper and 1 8x10 piece of colored construction paper

8.       Cut large blocks out of the colorful construction paper students may wish to cut some wavy lines for edges (keep it simple for time)

9.       Choose two color blocks and draw a repeating pattern with sharpie (time permitting. To finish in an hour this step may need to be omitted)

1        Glue colored blocks to cover the entire white paper background


          Take a 8x10 solid piece of colored construction paper and with the sharpie draw a repeating pattern to fill the entire page.


1     
            Fold patterned paper in half (vertical) with pattern on the inside.


1     Draw and S shape on the fold. Be sure to draw the lines from top to bottom staring from the top right corner and finishing at the bottom of the page.


1   Cut along the lines and open up to form a vase.


1    Glue the vase onto the background aligning bottom edges
1    Place Elmers glue drops on the background several inches above the vase at various heights
     Glue down 5-7 pieces of tissue paper. Wait until dry and then crinkle.
1   Add stems with construction paper if desired.


You're Finished!


Credit:  artwork influenced by http://artiswhatiteach.blogspot.com/2010/04/2nd-grade-matisse-flower-vases.html?m=1

Monday, November 17, 2014

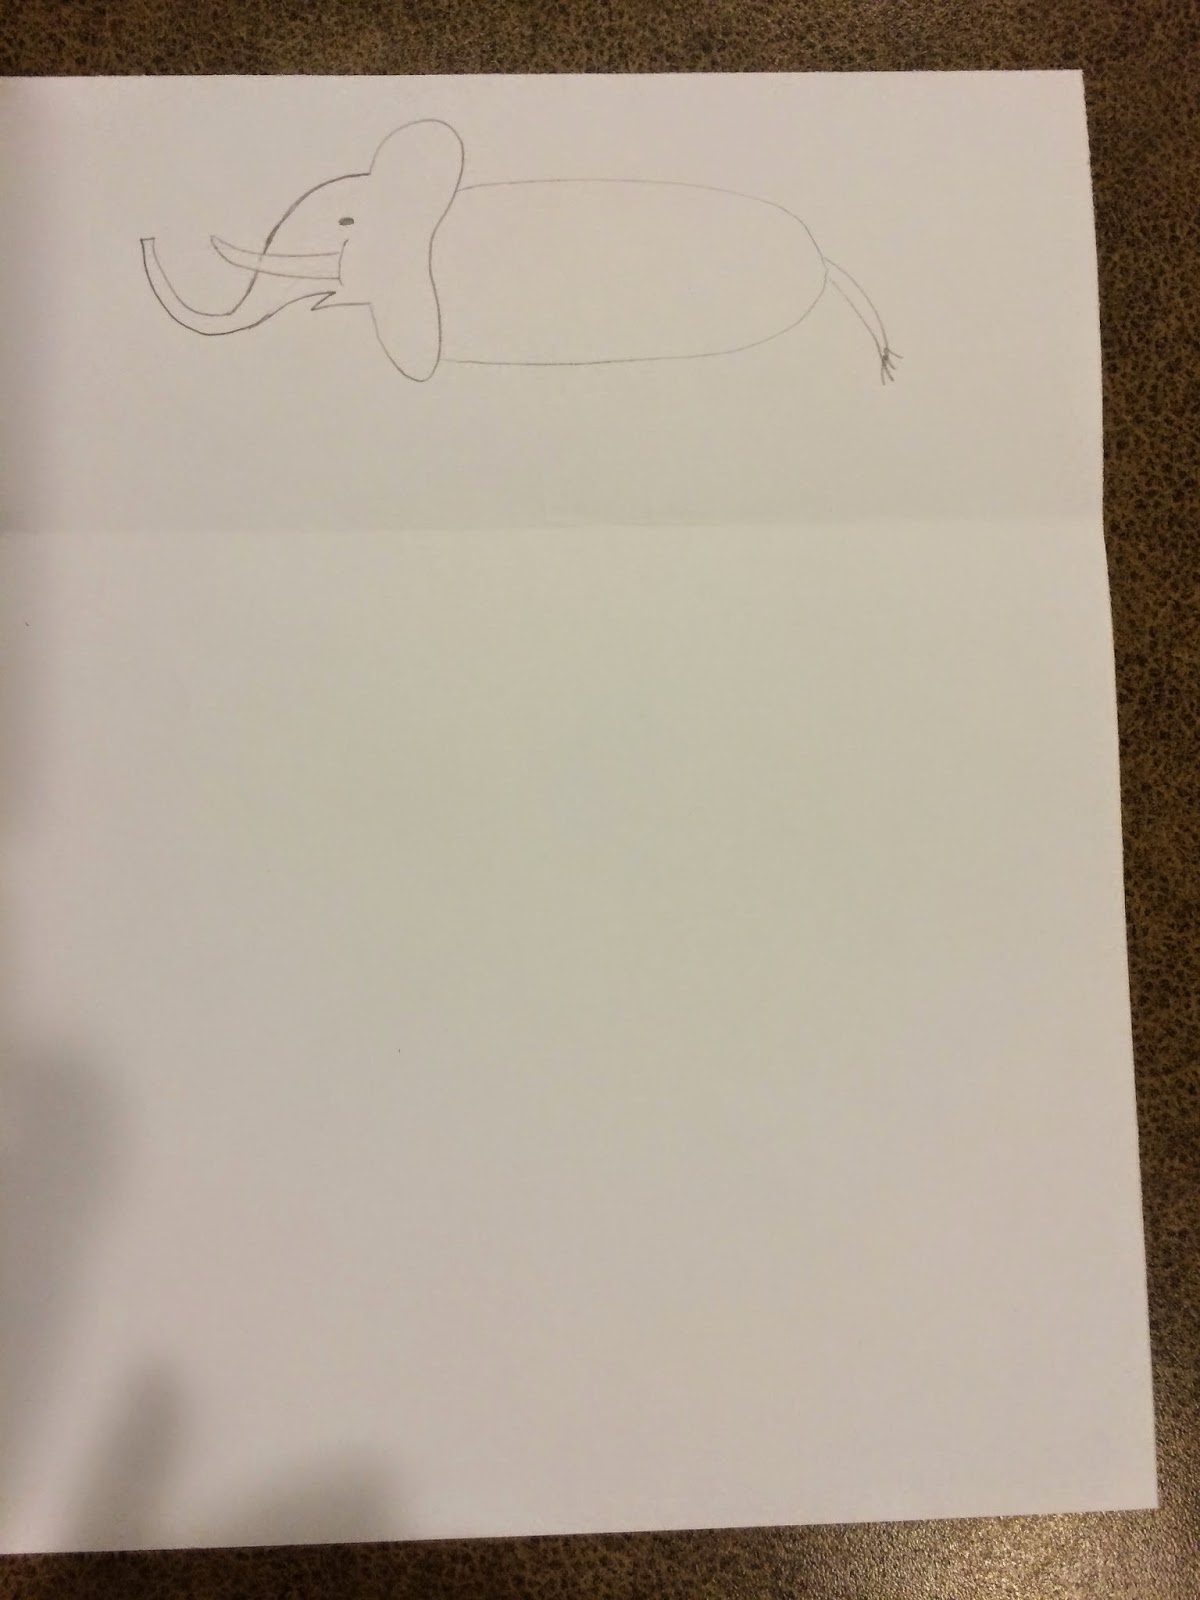
Salvadore Dali Elephants

Salvadore Dali Elephants


Medium:  Crayons, water colors

Reason for Lesson:  Help students understand the difference between realism and surrealism, with an emphasis on Salvadore Dali's style.

Label:  Surrealism, Dali, 2nd grade

Preparation prior to class:  Collect supplies. Cut water color paper. Draw line across top third of paper in pencil, very lightly. Print pics of Dali's work.

Class time: 1 hour

Materials:  Water color paper (cut the large pieces in thirds - three long strips), pencils, black sharpies, crayons, water colors, cups, water, paper towels. Printed pics of Dali's work.


Lesson Instructions:

1. Discuss Surrealism and show pictures of Salvadore Dali's work.


2. Guide-draw elephants:

Forehead


Trunk..wrap under to mouth. Draw ears to connect from forehead to chin.


Eye and tusk.
Body and tail.


Four super long legs.


3. Outline with sharpie.


4. Color with crayons..white tusk (so paint doesn't bleed) and grey elephant.


5. Paint with water colors..the ground and sunset sky...trees/ mountains if desired.


Wednesday, November 5, 2014

Pablo Picasso Cubism and Portraits - 3rd Grade

Reason for lesson:  To teach students about the life and work of Pablo Picasso

Prep time: 15 minutes

Preparation prior to class:  only gathering of supplies

Class time: 1 hour (depending on work pace of students)

Supplies:
     9x12 various colors of construction paper for each student
     Multiple color cut out squares of construction paper for students to use for eyes, nose and mouth.  
     Black crayon for each student
     Oil Pastels
     Glue
     Scissors

INSTRUCTIONS TO LEAD LESSON:
STEP 1:
Introduce students to artist Pablo Picasso by showing some of his artwork as well as sharing part or all of his bio with the students. Picasso BIO from: http://makingartfun.com/htm/f-maf-art-library/pablo-picasso-biography.htm

Pablo Picasso was born on October 25, 1881 in Malaga, Spain. He was the first child of Don Jose Ruiz y Blasco, an art teacher, and Maria Picasso y Lopez. At an early age Pablo showed an interest in drawing. His first words were "piz, piz", which is short for "lapiz", the Spanish word for pencil.

At the age of 7, Pablo began receiving art instruction from his father. His father believed that an artist's training should include copying the masters and drawing the human body from plaster casts and live models. The precision of Pablo's painting technique grew until it soon surpassed that of his father.

In 1895, Pablo's father accepted a position at Barcelona's School of Fine Arts. He asked officials to allow his son to take the entrance exam. The officials were impressed with Pablo's abilities and admitted him to the academy. As a student he lacked discipline but made friends and continued to grow as an artist.

At the age of 16, Pablo's father enrolled him in Spain's most distinguished art school, Madrid's Royal Academy of San Fernando. However, his instruction at the Royal Academy lasted only a short time as he struggled to accept formal instruction. In spite of these difficulties, his time in Madrid was not wasted. Pablo visited Madrid's museums and saw the paintings of Diego Velasquez and Francisco Goya, though it was the works of El Greco that he admired most.

In 1900, Picasso made his first trip to Paris. At that time Paris was considered to be the art capitol of Europe. While in Paris, Picasso's work began to attract the attention of art collectors. By 1905, he had become a favorite of American art collectors Leo and Gertrude Stein. It was through them that Picasso met French artist Henri Matisse. The two became lifelong friends.

In 1907, Picasso painted one of his most important works - Les Demoiselles d'Avignon, - creating with painter and sculptor Georges Braque the brand new art movement known as "Cubism". Cubism allowed the artist to show his/her model from many different viewpoints. In the paintings of earlier times, the artist showed his subject from one particular viewpoint. In cubist paintings the artist may show the front and the side of a person's face at the same time.


Pablo Picasso died on April 8, 1973 in Mougins, France. He is best remembered as the co-founder of Cubism, and for Cubist works Les Demoiselles d'Avignon (1907), Three Musicians (1921) and Guernica (1937).

STEP 2:
Have students choose the construction paper to use for their projects.  Show them various ways to draw Picasso eyes, nose and mouth.   INSTRUCTIONS FROM:  http://www.pinterest.com/pin/129971139219770944/


STEP 3:  Have students choose one eye that is facing forward and one eye that is from a profile shot (side view).  Then have them draw the eyes, nose and mouth on four different colors of construction paper with black crayon

STEP 4:  Use oil pastels to color in eyes, nose, and mouth.   Have fun with blending and adding special touches.

STEP 5:  On 9x12 construction paper, have student draw shape of face, hair and neck with black crayon.

STEP 6:  Glue eyes, nose, and mouth to picture.

STEP 7:  Use oil pastels to color in and shade remaining

areas.


FINAL ART MASTERPIECES BY THIRD GRADERS

Kandinsky and Shapes - 3rd Grade Art

KANDINSKY and SHAPES – 3rd Grade Art

Materials:
            Watercolor Paper      
            Pencils
            Rulers
            Sharpies
            Watercolor Paints
            Geometric Shaped Items for students to trace (ex: DVD’s, Coins, etc.)
            Classical Music

Intro to Lesson:  Discuss with class how Kandinsky was influence by music to create Art.  Show pictures of his abstract artwork and ask students to tell you what they see.  Kandinsky has been attributed to being the first abstract artist.  During the lesson students will listen to classical music while creating their masterpieces.  Discuss how different types of music can reflect different shapes and colors.  Encourage them to allow the music to help them create art.

Step 1:  Begin playing classical music as students draw lines and shapes in pencil.
Step 2:  Outline pencil lines with a Sharpie
Step 3:  Use water color paint to fill in the different shapes and lines.  Encourage them to use colors that they “feel” from the music.


Saturday, October 25, 2014

Andy Warhol Style Pumpkins

Andy Warhol Style Pumpkins


Medium:  Oil Pastels, Water Color Paint

Reason for Lesson:  Help students understand pop art with an emphasis on contrasting warm and cool colors, and Andy Warhol's specific style.

Label:  Pop Art, Warm and Cool Colors

Preparation prior to class:  Collect supplies.

Class time: 1 hour

Materials:  White cardstock 8x11", pencils, pumpkin cutouts (1 per student), oil pastels, water colors with brushes, cups, water, paper towels.


Lesson Instructions:

1. Have students fold paper in half hot dog style, then unfold and refold again in half hamburger style.


2. Using a pencil, lightly trace pumpkins in each of the four squares.


3.   Using oil pastels, color in pumpkins with various warm colors.


4. Using water color paints, paint the squares around each pumpkin with contrasting cool colors.