Monday, December 14, 2015

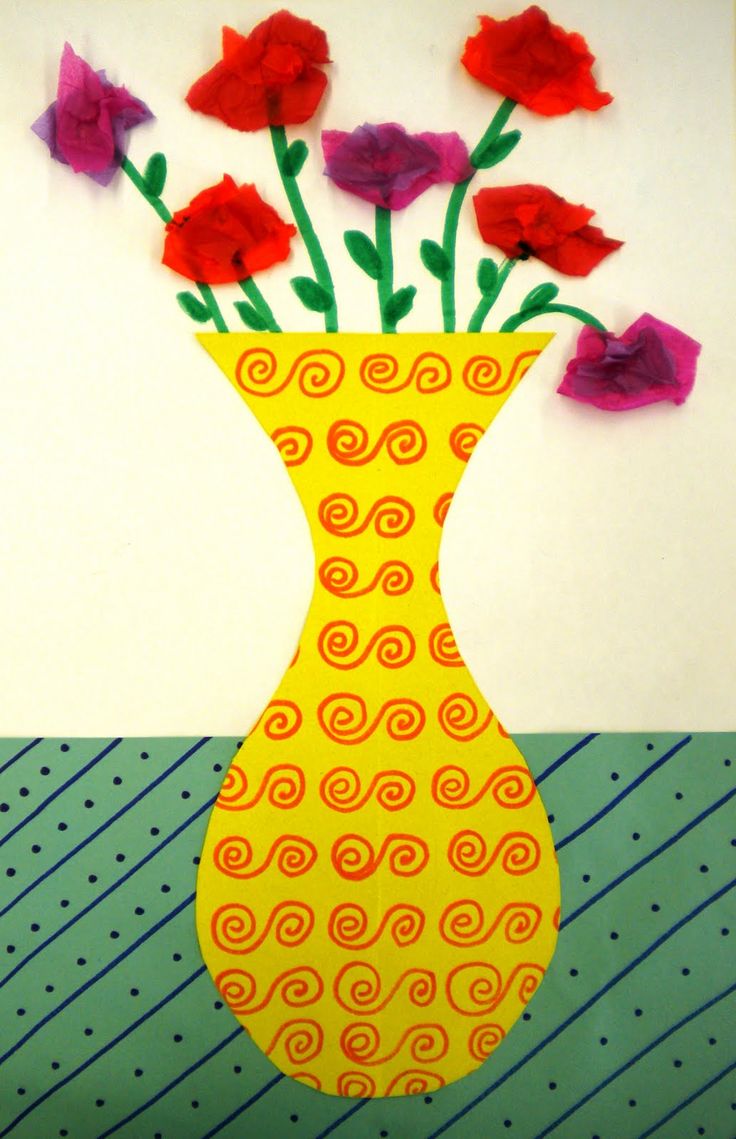
Torn Paper Christmas Tree 
Image 

Grade: 1st 
Date: December 
Medium: torn construction paper 

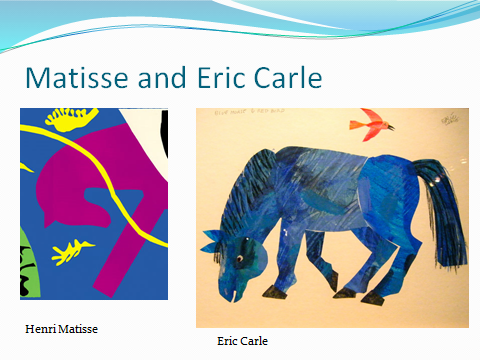
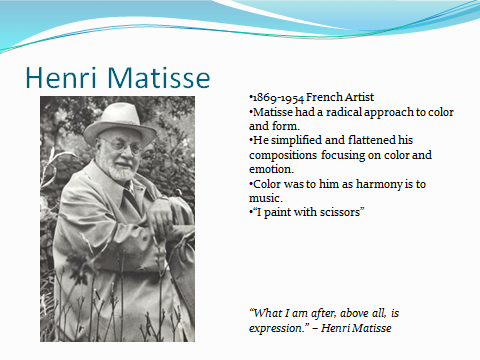
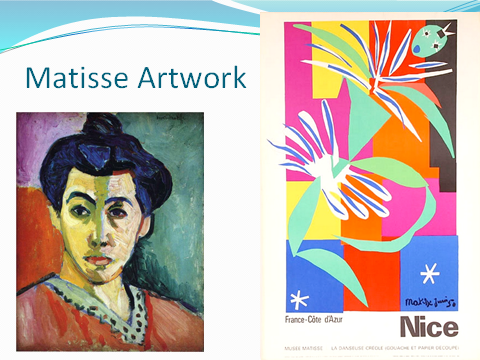
Reason for the Lesson:  The children will learn about collage and experiment with a torn paper technique to create their own.  A collage is an artwork made up of portions of various existing materials and arranged so that they join, overlap or blend to create a new image. Eric Carle is a great connection to make with this type of collage art. He was influenced by Henri Matisse who was famous for his quote, "I paint with scissors." Eric Carle used collage in his children's book illustrations such as The Very Hungry Caterpillar.

Element of Art:  A torn paper collage is an example of texture in art.  The small pieces of tissue will give the tree more texture by adding a 3-demensional piece.  This is an example of tactile texture. 

Prep Time: 5 minutes 
Class Time: 45-60 minutes 
Materials:  black, green, brown and yellow construction paper, glue, tissue paper. 

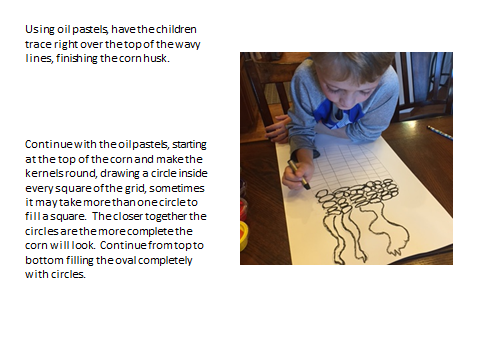
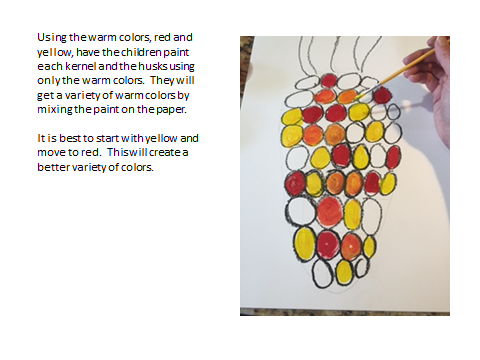
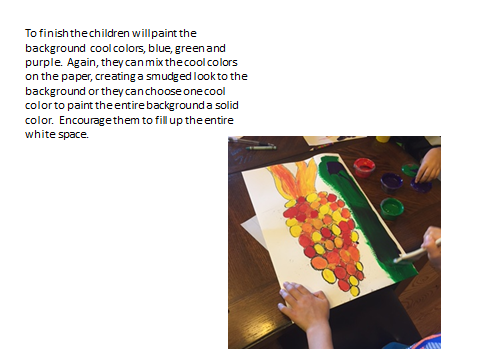
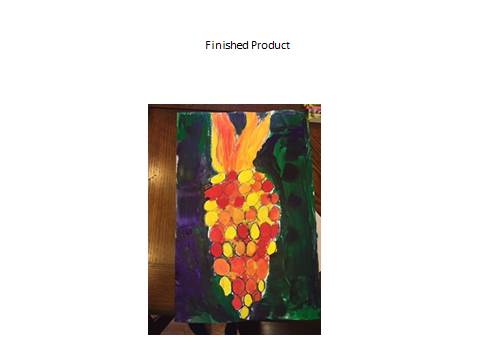
Instructions: 1. Tear up several pieces of green construction paper. 2. Tear up small amount of brown construction paper. 3. On a plain piece of black construction paper, have kids draw a triangle shape with glue and cover with green pieces of construction paper. 4. Draw the trunk of tree with glue and cover with brown construction paper. 5. Crumble small pieces of tissue paper (red,purple,yellow and blue)and glue onto the tree. 6. Glue 3 pieces of yellow on top of tree for the star. 


Monday, November 30, 2015

Candy Cane Art

Title of Lesson:  Candy Cane Art


Grade:  4th Grade

Medium:  Colored pencils, Oil Pastels (white only), Watercolor

Reason for Lesson:  

Elements of Art: Color, Line, Shape

Prep Time:  10 minutes

Preparation prior to lesson:  Gather supplies in Art Closet (4th grade bin)

Class Time:  45 minutes

Materials:  Water color paper, Pencil, Candy Cane Stencils for each student, colored pencils and Oil Pastels (white only), water color

Art Lesson on Perspective:
  • Briefly teach the concept of perspective in art. 
  • Have the children look at the candy cane picture and notice how the candy canes look like they are falling off the page.
  • Have the children point out how they know that the candy canes are intact even if they don't all show up on the page. This is perspective in art. We don't have to show the entire candy cane to know that the candy cane is complete.
  • Our brain fills in the rest of the picture even when the candy cane is not all on the page.
  • Also have the students looks closely at how the candy canes look 3 dimensional. How did the artist create this look?
  • Remind them of these lessons as they are creating their artwork
  • A good book to use to teach the lesson of perspective is the Napping House by Audrey and Don Wood. As the pictures progress in the book the angle changes so that you see the pictures from the top rather than straight on. The perspective of the artwork changes giving a sense of movement. 
  • Show the progression of the perspective as you flip through the pages of the Napping House book. You can also show the beginning, middle and end picture to show the gradual progression.


Instructions to Lead Lesson:  
  •   Have the students trace the candy cane stencil an odd number of times.
  •  Make sure the students overlap the candy canes. Erase the overlapping lines
  • Using a pencil draw lines to divide each candy cane into sections.
  •  Choose two colors per candy cane and color in each section with colored pencils. 
  • To create a 3-D look have the children color the outer part of each section of the candy cane darkly and move toward the center with less pressure to make it look lighter in the center of each section of the candy cane.
  • To create a dimensional look, use white oil pastel in the center only. (see example below)
  • Once coloring is finished, have students lightly paint the background with one color using watercolor paints.
  • A tip for the water coloring at the end of the lesson: Create a water color station at the back of the classroom with a couple colors the children can use to paint their background. When the children finish their coloring they can bring their artwork to the back of the classroom to lightly paint the background.
  • When using liquid water color, to create a light background color, you will only need a few drops of water color per cup of water. Play with the amount to create the light color needed. 


Credit:  artsonia.com


Wednesday, November 4, 2015

Spiral Christmas Tree Ornaments

Matisse Inspired Christmas Tree Ornaments
Medium: Paper, Scissors

Reason For Lesson: To learn about Henri Matisse and how he used scissors as a tool for creating artwork. Also for creating ornaments to be hung in the Winter Extravaganza.

Elements of art: Paper, collage, form, color, pattern

Preparation prior to lesson: gather supplies, photocopy spiral onto green cardstock, photocopy star template onto yellow cardstock

Materials: Green construction paper with spiral, yellow stars, Q-tips, tempura paint, glue sticks, scissors

Instructions to teach art lesson:

Introduce the lesson and let the Children know they will be learning about Henri Matisse and also creating ornaments to be hung in the Winter Extravaganza. Remind the students to do their very best work

2.       


Introduce Henri Matisse. Give a brief bio and try to relate his life in some way to the kids (keep this lesson time brief, take no more than 5-10 minutes for the Artist lesson)
Show examples of Henri Matisse’s artwork and have the students discuss what makes Matisse’s artwork unique. Talk about what the artist is trying to convey with his art. 
What feelings are evoked?

Have the students discover different repeating patterns in Matisse’s artwork. Have them look for all the different variations of pattern. What colors, themes, medium does he use? 
What feeling  does the repeating pattern create in the artwork? 

Be sure to point out that Matisse “Painted with Scissors”. He used collage and patterned paper in much of his later artwork.


 Point out that Eric Carle (The Very Hungry Caterpillar) was influenced by Matisse. You may wish to show some of Eric Carle’s books to show how he was influenced.

Eric Carle (1929) was influenced by Matisse.  How do you take what you like from your friends and make it your own?


Let the kids know they have the opportunity to "paint with scissors" just like Matisse to create their Christmas tree ornament for the Winter Extravaganza

1. Cut out the spiral circle

 2. Starting from the outside follow the lines to cut the circle into a spiral
 3. Following the lines on the template cut until it makes a spiral.


4. Place a small amount of each paint onto a extra piece of cardstock or paper plate
5. Dip a Q-tip into a small amount of tempura paint and dot the spiral in a pattern


6. Cut out 2 stars from the templates on the yellow cardstock
7. Fold a 2 inch piece of ribbon in half.
8. Using a glue stick place the glue onto the insides of both stars.
9. Place the folded ribbon inside the stars and press together to form a hanger for the ornament.
10. Be sure the 4th graders put their Name and Teacher's Name on the inside of the ornament.

credit: parent's magazine

Monday, November 2, 2015

Shaving Cream Christmas Ornaments

Title of Lesson: Shaving Cream Christmas Ornaments (For Winter Extravaganza)

Medium: Paint, Shaving Cream, Paper

Reason for Lesson: Creating art for the Winter Extravaganza, and learning about how different mediums work…the shaving cream carries the paint to the paper, but doesn’t soak into the paper so it can be scraped away, leaving only the paint behind!

Prep Time: Materials will be in the 2nd grade box. The docent will do step 1-3 in a few cardboard boxes and then the students will bring their cut-out ornament to dip in the shaving cream.

Preparation prior to lesson: gathering supplies, printing ornament on paper for students to cut out.

Class Time: 30 minutes

Materials: Shaving cream (it must be white), Acrylic paint in several colors, Toothpicks, Old loyalty card (or something else you can use as a scraper), White cardstock shaped ornaments, Brown cardboard box (to put the shaving cream in)

Step by Step Instructions:
1.       Start by squirting your shaving cream into your brown cardboard box. Raileigh had fun playing in it for a bit before we moved onto the next steps. 

1.       Now, take your acrylic paint and squirt lines of it on top of the shaving cream. We chose to go with a rainbow of colors.  However, you can do only warm or cool colors, or even colors to fit with a certain holiday. 

Take your toothpick and swirl the paint around a bit. It's going to begin to look slightly marbled. You can "marble" it as little or as much as you'd like

It is time for the fun to begin! Take a piece of your cardstock and gently press it into the shaving cream and paint. Make sure to press all of the sides down

 Carefully remove your cardstock from the shaving cream. It should have a mixture of shaving cream and paint stuck to it.

2.       Take your "scraper" and scrape away the shaving cream. The paint stays behind, leaving a lovely marbled painted look on your paper.

3.       Repeat several times. Your shaving cream and paint will eventually get kind of muddled. However, we were able to do this 10-12 times easily before that began to happen. 

Clothespin Worry Dolls

Title of Lesson: Clothespin Worry Dolls

Medium: Clothespins, Yarn, Sharpie Markers

Reason for Lesson: Lesson was created to teach the students about how art can be a great gift to give someone else, and how there are many different mediums that you can use to create art.

Elements of Art: You can talk about color, shape, and repetition. The repetition of wrapping the yarn around the clothespins can create the look of a piece of clothing (ie. Shirt, pants), and the yarn “loose” on the top gives the impression of hair. Using the same medium (yarn) in different ways can create very different things. Making worry dolls provides a great opportunity for storytelling, to discuss coping, and the repetitive, patterned nature of wrapping the yarn around the clothespin can be soothing and calming.

Prep Time: baggies for individual students will be made by the coordinator for the docents to hand out in class. Baggie will contain the clothespin, and yarn.

Class Time: 1 hour

Materials: Clothespins, yarn, pipe cleaners, Sharpie markers, glue, plastic baggies

Instructions to Lead Lesson:
Worry Dolls: in Spanish, Muñeca Quitapenas (dolls that remove worry) sometimes referred to as trouble dolls are a traditional Guatemalan toy that are small, colorful little people that a person puts under their pillow after telling them something that’s bothering them, and then goes to bed. Overnight, the worry dolls are said to worry in the person’s place, letting them sleep peacefully. Worry dolls are used to help children ease their minds.


1             1.  Wrap & twist a pipe cleaner around the clothespin to create arms. Cut to size for arm length.


2. Begin wrapping your clothespin with yarn. Wrap over the pipe cleaner as well.


3.      When wrapping gets to the waist, you can start wrapping each “leg” individually.
4.      Wrap the other leg.
5.      Use markers, colored pencils, or paint to add a facial expression, hair, skin tone, shoes, etc. Cut a heart out of the felt and glue to the front.


Warm and Cool Corn


Lesson Title: Warm and Cool Corn

Medium: Tempura Paint, Oil Pastels
Reason for Lessons: to introduce the idea of warm and cool colors
Elements of art: color, line, perspective
Class Time: 1 hour


Saturday, October 31, 2015

Matisse Flower Vases


Title of Lesson:  Matisse Flower Vases
Medium:  Paper collage and sharpie
Reason for Lesson:  Learn about the artwork of Henri Matisse and the principle of patterns and color.
Label:  Color, movement, harmony, Matisse, Flower, Collage, 5th grade

Prep Time:  20 miutes

Preparation prior to lesson:  gather supplies, cut tissue paper into 2x2 inch squares

Class Time:  1 hour
Materials: White Background paper. Many different colors of construction paper. Markers, Sharpies, Glue, 2x2 inch square colored tissue paper

Instructions to Lead Lesson:  

Introduce Henri Matisse. Give a brief bio and try to relate his life in some way to the kids (keep this lesson time brief, take no more than 5-10 minutes for the Artist lesson)

  • Show examples of Henri Matisse’s artwork and have the students discuss what makes Matisse’s artwork unique. Talk about what the artist is trying to convey with his art. What feelings are evoked?
  • Have the students discover different repeating patterns in Matisse’s artwork. Have them look for all the different variations of pattern. What colors, themes, medium does he use? What feeling  does the repeating pattern create in the artwork? Be sure to point out that Matisse “Painted with Scissors”. He used collage and patterned paper in much of his later artwork.
  • Point out that Eric Carle (The Very Hungry Caterpillar) was influenced by Matisse. You may wish to show some of Eric Carle’s books to show how he was influenced.

In 5th grade for the month of January the students are learning about the Renaissance. Use this art lesson to highlight how art is influenced and evolves over time.
  • Art prior to the Renaissance (the 1200’s) was flat and lacked perspective or realism. The subjects were not drawn in believable or realistic settings. Show Cimabue, Madona Enthroned
  • Most artwork was of a religious theme prior to the Renaissance
  • The Renaissance was a time of artistic change. Leonardo Davinci influenced how artists created during the Renaissance. He started adding more realism and made the subjects more lifelike. He also added more believable settings and included nature in his artwork. Show Leonardo, Madonna on the Rocks, 1483)
  • What differences do you see in these two pieces? What similarities?

  • Fast forward to Henri Matisse (1900’s). Show pictures of Henri Matisse. How is his artwork the same or different from the Renaissance artwork. What elements are the same and what has changed?
  • Art is still changing. Eric Carle (1929) was influenced by Matisse.  How do you take what you like from your friends and make it your own?


  • Create the patterned vase on a collage background artwork
matisse vase.jpg

  • Begin with Vertical 12x18 in white watercolor paper and 5 sheets of various sizes of colored construction paper and 1 8x10 piece of colored construction paper
  • Cut large blocks out of the colorful construction paper students may wish to cut some wavy lines for edges (keep it simple for time)
  • Choose two color blocks and draw a repeating pattern with sharpie (time permitting. To finish in an hour this step may need to be omitted)
  • Clue colored blocks to cover the entire white paper background.
  • Take a 8x10 solid piece of colored construction paper and with the sharpie draw a repeating pattern to fill the entire page.
  • Fold patterned paper in half (vertical) with pattern on the inside.
  • Draw and S shape on the fold. Be sure to draw the lines from top to bottom staring from the top right corner and finishing at the bottom of the page.
  • Cut along the lines and open up to form a vase.
  • Glue the vase onto the background aligning bottom edges
  • Place Elmers glue drops on the background several inches above the vase at various heights
  • Glue down 5-7 pieces of tissue paper. Wait until dry and then crinkle.
  • Add stems with construction paper if desired.

Credit:  artwork influenced by http://artiswhatiteach.blogspot.com/2010/04/2nd-grade-matisse-flower-vases.html?m=1