Positive and Negative Space Zentangle
What is Zentangle?
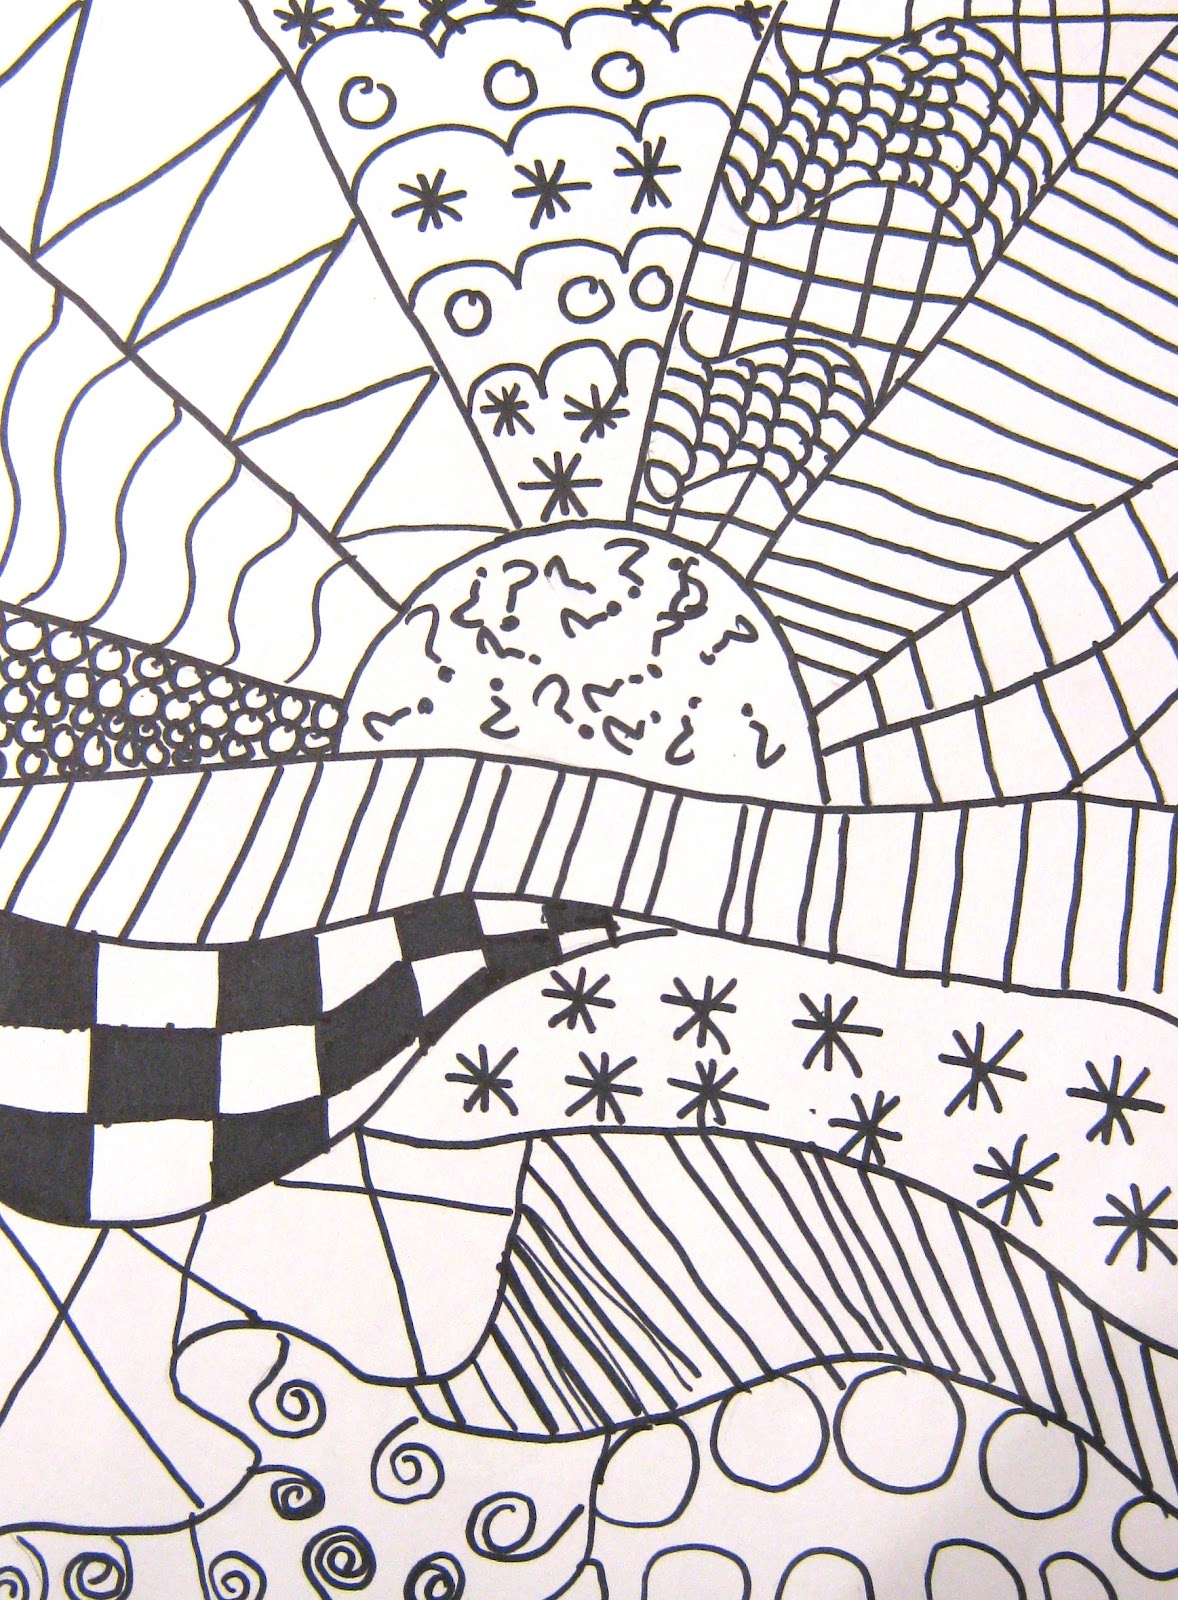
Zentangle is a method of drawing simple repeating
patterns. Creating beautiful designs that come from a relaxed state. Like yoga or
meditation, this relaxed focus decreases stress, increases mindfulness, and
enhances creativity. .
And how did Zentangle come about?
A man, Rick Roberts
(a former monk and maker of native American flutes), was watching a woman,
Maria Thomas (a tremendously talented calligrapher), putting details into an
illuminated manuscript she was working on…
“One day, Maria told
Rick what she experienced as she drew background patterns on a manuscript she
was creating. She described her feelings of timelessness, freedom and
well-being and complete focus on what she was doing with no thought or worry
about anything else.
“You’re describing meditation,” Rick said.
Rick and Maria wondered if they could create a simple system
so others might enjoy a similar experience. And so began the journey towards
discovering this simple and elegant system called Zentangle.”
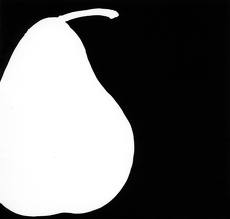
What is Positive and Negative Space?
Positive Space is the area of interest or shape.
The negative space is the area around that shape.
The white pear is the positive space, the black color is the negative space.
Reason for lesson: to learn to principle of art that is positive and negative space
Supplies: 8x10 construction paper, colored sharpies, newspaper
Time for lesson: 1 to 1.5 hours
Lesson Plan
Begin lesson with a description of positive and negative space. Then explain Zentangle and how it began.
1. Begin by folding paper vertically in half. DO NOT FULLY CREASE. Just have the students touch down the top and bottom to create a slight line in the center of the paper
2. The students will use ONE color sharpie for the entire project. This can be a dark color of their choice. Light colors like yellow don't stand out and should be avoided. Open the paper and draw a line down the center of the paper
3. Draw a second line right next to the first to create a THIN stem
4. Have the students put a small dot at the very top of the stem on the right side of the line at the very top of the paper. Using three fingers to measure have the students place SMALL dots down the paper alternating between left and right sides of the stem.

5. Now have the students measure three fingers from the edge of the paper and make a SMALL dot directly across from the dots they made on the stem.
6. Making an arc (or an upside down c) have the students connect the dot from the center stem to the outer dot. (The first and last arcs will be off the top and bottom edges of the paper.) Then repeat the same arc from the center stem to the outer dot underneath to make a leaf shape. (if some students are having trouble connecting just two dots you can add a third dot for them to follow in the center)
7. Now we will introduce positive and negative space. The leaves on the right hand side of the paper will be decorated in the positive space, The leaves on the left will be left blank and the space around them (or negative space) will be decorated.
8. Have the students brainstorm some different repeating patterns. Anything can be a zentangle pattern. It is simple shapes or lines that are repeated over and over. Captures the students ideas on the white board. Here are some simple examples.
9. The students will be using the SAME pattern for the entire project. Please remind them to pick one pattern and use it throughout the project.
10. Once the students have chosen their pattern. Begin with the leaves on the right and have them fill their leaves with that one pattern in the positive space.
11. Once they are done with the positive space leaves on the right use the same pattern to fill in the negative space around the leaves on the left.