Tuesday, January 26, 2016

Picasso Inspired Musicians of the Night


https://s-media-cache-ak0.pinimg.com/originals/81/f6/f5/81f6f55790da1a5c6e27fcc248c50320.jpg
Artwork was taken from Pinterest without an artist’s credit.

Medium:  Chalk Pastels


Reason for Lesson:  Lesson was designed to teach the element of space using the artwork of Picasso.


Prep Time:  30 minutes


Preparation prior to the lesson:  Study the life and works of Picasso including “Three Musicians”
This youtube video was helpful for shading and the technique of the chalk pastels for snowmen.


Materials:
Grey paper, colored paper as a mat.
Grey paper is cut to 6 x 9 inches.  The mat is 9 x 12 inches.
Chalk pastels for students
paper towel for each student
baby wipes to keep hand clean for each student


Instructions to Lead Lesson:
Begin talking about the life of Pablo Picasso.  Share interesting facts about his life and include his art “Three Musicians”


The Element of Art we are discovering is space.


We are going to create a snowman musician in the night using chalk pastels.
Some important techniques to remind the children of chalk pastels are:


Chalk pastels are fun to work to blend and soften colors.  Use a tissue or paper towel to blend; avoid using fingers to blend.
Keep your hands clean and be careful while touching your art so as not to muddy up the art.  Instead of blowing the chalk off the paper tap to remove any excess.
Wipe off your pastels after to each use to keep their pure color.


Using the grey 6 x 9 inch paper draw with white pastel the ground and the shape of the snowman.  Shade with white the side of the snowman that faces toward the moonlight.  Softly blend white chalk to the other side to fill in the snowman.


Sweep yellow chalk on side of snowman facing the moonlight.  Sweep light blue on the backside of snowman to create a shadow.  Add light blue and a small sweep of black (creating grey) on the snow hill to cast a shadow of the snowman.  Blend the colors using a different section of your tissue after changing to each color.  Use a clean portion of the cloth to wipe each chalk pastel after use to keep from muddying the colors.


It is now time to add details.  The snowman’s face, hat, scarf, clothing, arms and musical instrument.  Blending as needed with a tissue. Lastly, add white dots of snow.  Mat on colored paper.  Spray art outside with a clear sealer.

https://s-media-cache-ak0.pinimg.com/originals/81/f6/f5/81f6f55790da1a5c6e27fcc248c50320.jpg

Zentangle Hand Art


IMG_8355.JPG


Medium:  Black Fine Tip Sharpies

Reason for Lesson:  Lesson was designed to teach the element of art - line using the artwork style of Zentangle.

Prep Time:  15 minutes

Preparation prior to the lesson:  Study the the art form Zentangle.

Materials:
Black Sharpies for each student
White piece of paper for each student cut at 7 x 9 inches


Instructions to Lead Lesson:
Explain the art style Zentangle.

The Zentangle Method is an easy-to-learn, relaxing, and fun way to create beautiful images by drawing structured patterns. Almost anyone can use it to create beautiful images. It increases focus and creativity, provides artistic satisfaction along with an increased sense of personal well being.
The Zentangle Method is very different from regular drawing, painting and other art forms. It is meant to be a form of artistic meditation that anyone can do. The act of creating the Zentangle is just as important as the final outcome, which is appreciated for its unique beauty. Zentangle creations adhere to the following philosophical tenets:
  • Its creation is unplanned. When you begin creating a Zentangle, you're encouraged not to have an end goal in mind. Rather, allow the pattern to reveal itself as you draw.
  • Its creation of a Zentangle is deliberate, yet unexpected. Each stroke should be made deliberately, rather than hesitantly. Instead of erasing stray marks, the artist should use them as the foundation for an unexpected pattern.
  • Its creation is celebratory. Like meditation, the Zentangle Method is meant to feel freeing and healing. It's a way to celebrate the beauty of life.[2]
  • A Zentangle is timeless. No technology or special tools are used. Zentangles should connect those who make them to the timeless human endeavor of putting pen to paper.


https://s-media-cache-ak0.pinimg.com/736x/44/c5/3c/44c53c7a306396f8306d7e571f711696.jpg

http://craftwhack.com/wp-content/uploads/2014/09/zentanglepatterns4.jpg

https://blogger.googleusercontent.com/img/b/R29vZ2xl/AVvXsEhye_Mnuf3-PwtKRaiAm_zxboo5KqiksslxQLKdun0b6U7Rn1UZfoSnuBbMrlK0SfLSdF5o5KZD5LSQJiRgt7qrvPYGoGeoXsu3wpuiiQGBZ7prQYbPtXH4EdtARp2lvIQGH7kLYPbQgDDy/s1600/patsheet25.jpg

We will begin our lesson by tightly tracing your hand with a pencil on white paper.  Trace sketched hand with a black sharpie.  Now it is time to tangle.  Tangling is the verb form of Zentangle.  Take a look at the sample zentangle designs and listen to your inner artist to decorate the inner space of your hand.  Use larger designs than you see on the sample paper so you will have enough time to complete our art project today.

Teach a few sample Zentangles.  found here.

The students will have time to complete the Zentangle hand art project.

Mat finished project with a bright color.
IMG_8355.JPG


Analogous Ice Cream Cone

Medium:  Oil Pastel
Reason for Lesson:  Introduction to Color Wheel, Oil Pastels, and Shading technique
Materials: 
From Student’s Desk: Pencil, Eraser, Ruler or Straight Edge, Glue Stick
 Materials to supply to student:
White paper,
Colored paper to mount artwork on.
Oil Pastels
One crayon – any color – to compare with oil pastels
Plastic cup for circle template
One paper towel – to wipe off the white pastel

Instructions to Lead Lesson: 


Introduce the Color Wheel
Define:
Primary Colors – Red, Blue, Yellow
Secondary Colors – colors you make when you mix primary colors: Purple, Green, Orange
Complimentary Color- colors across from one another
Analogous Color – Colors next to each other- our focus!
Tint – When you add WHITE to a color
Shade – When you add black to a color

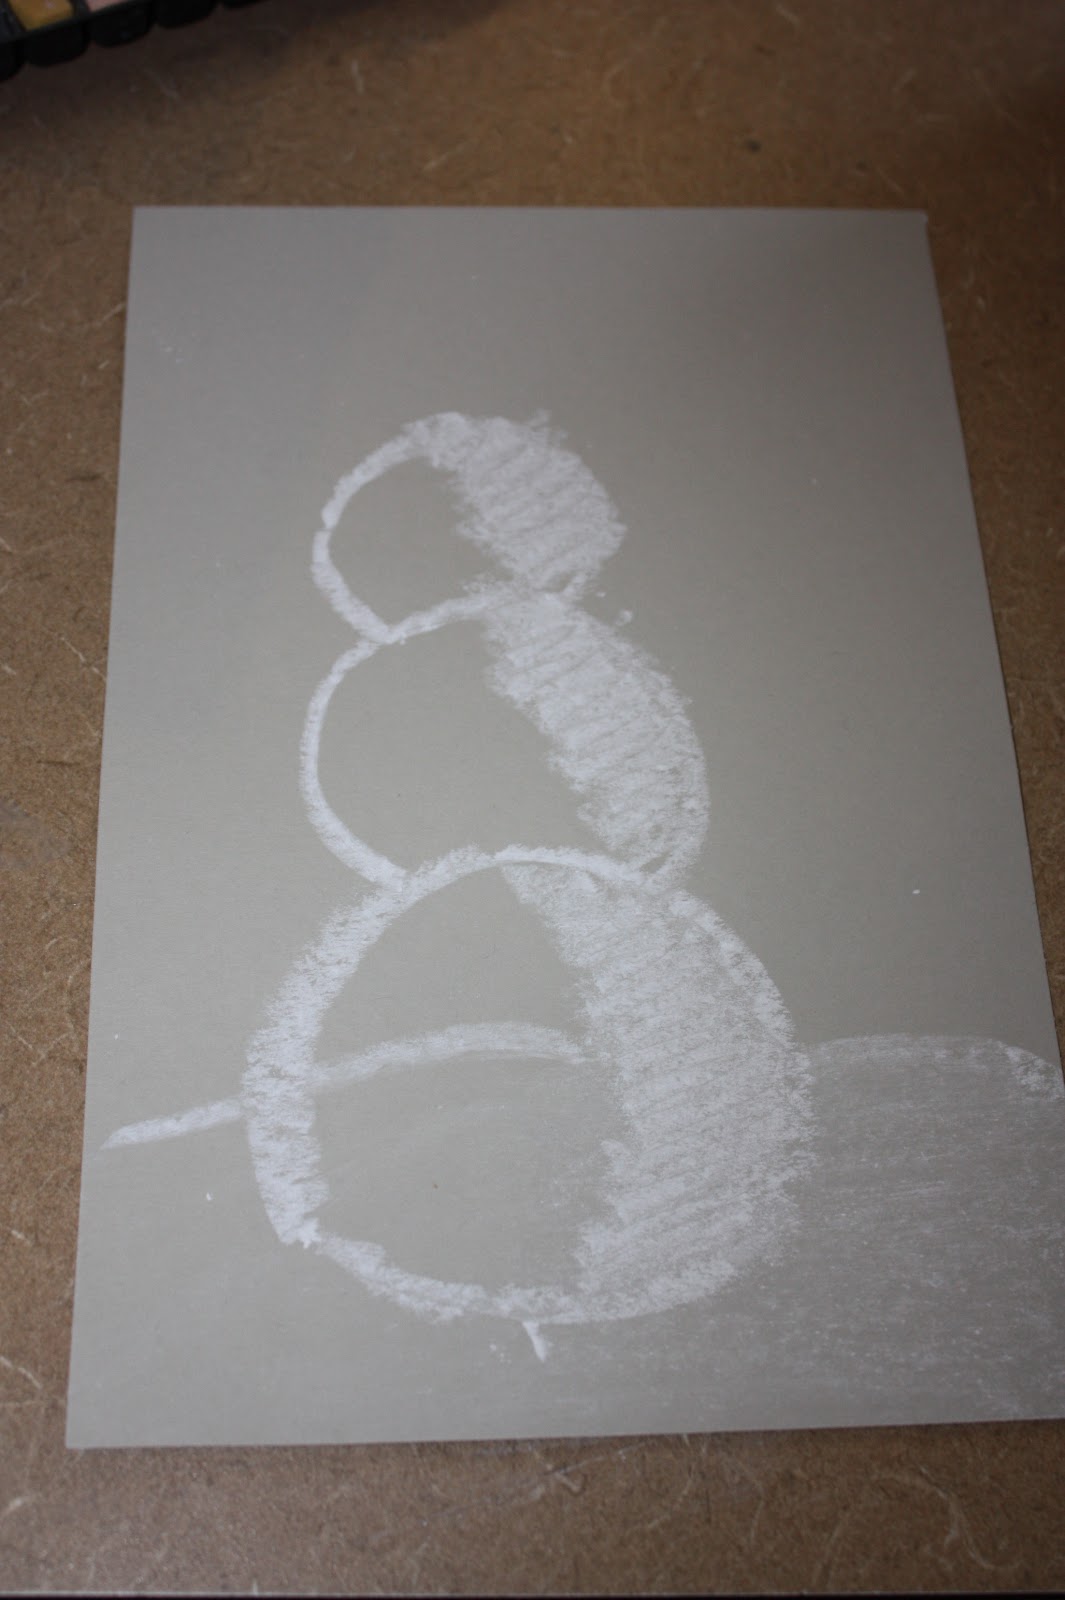
1. Start with pencils – instruct students on drawing a triangle (use their rulers) for cone on the bottom, and three or four circles for the “scoops”. Students can use the cups to trace circles. Circles should overlap slightly.

2. Erase lines where circles overlap and add a squiggly line, to look like ice cream is melting.
 3. EXPLAIN SHADING before students open oil pastels. Shine light on a ball and talk about what side is lighter and what side is darker.


4. Get out Oil Pastels – as a class order them like a color wheel – or rainbow, this will help students determine what colors are analogous/next to each other on color wheel.

5. Have students write name on back of project with the oil pastels,also have them write it with a crayon. Note crayons are made of wax, PASTELS are made of wax plus oil. How does it feel different?

6. Work through the lesson doing one scoop at a time so you can reiterate what “analogous color” means. If they get ahead they will miss the point.

Each student picks a color to do the TOP SCOOP  (note: in picture I started with the cone, but it is much better to start at the top and work down so students are not dragging their arm through their work and smudging it.)

SHADING A SCOOP:
         a. Outline the top scoop with their color of their choice.
         b. LIGHTLY color it in.
c. Make it darker on the left side by adding another coat of the same color pastel
e. WIPE off the white pastel tip if there is any color on it, and add white to the lighter side of the ice cream scoop.
For the next scoop: Students will use an analogous color to the top scoop. In other words if their top scoop was yellow, they could choose orange or green for the scoop below it because yellow is next to those colors on the color wheel.
For the third scoop: choose the next analogous color in order. So if top scoop was yellow, next was orange, and the third would be red. Note, if they started with yellow and went the other way on the color wheel, the order would then be yellow, green, blue, purple.


7. For the cone, choose brown and repeat the shading process
8. Mount work to a construction paper, color of their choice, using a glue stick. 


Monday, January 4, 2016

The Dot

Image 

Grade: 1st 
Date: January 
Medium: water colors 
Reason for the Lesson:  The children will have to opportunity to experiment with the use of water colors and create their own dot or “not-a-dot”  This lesson will also introduce the kids to the concept of space in art. 
Element of Art:  Space.  By filling in the dot with watercolors they are creating a “positive space” image. If the children paint around the outside of the dot, leaving the inside white, this is an example of a negative space image.  
Positive space is best described as the areas in a work of art that are the subjects (in this project, the dot), or areas of interest. Negative space is area around the subjects, or areas of interest. 


Prep Time: 10 minutes (to prep water colors) 
Class Time: 45-60 minutes 
Materials:  The Dot, By Peter H Reynolds, water colors, brushes, water color paper with dot  
Instructions: 1. Start by reading the story The Dot. (While one docent is reading the story, the other can set up the water color paints)  
2. Before handing out the white paper with the dot on ithave the kids decide whether or not they will paint the inside or outside of the dot. This is a good place to explain the basic concept of negative and positive space.  
3. Encourage the children to use lines and shapes to completely fill the positive space (inside the dot) or the negative space (outside the dot). 
4.  There is a lot of opportunity for artistic freedom with this project.  There is no right or wrong way to fill in the space.  For best results, encourage the kids to use a lot of different colors, expect for brown and black. 

The Dot 
Image 


Credit: http://dripdripsplattersplash.blogspot.ca/2011/10/first-six-weeks.html